
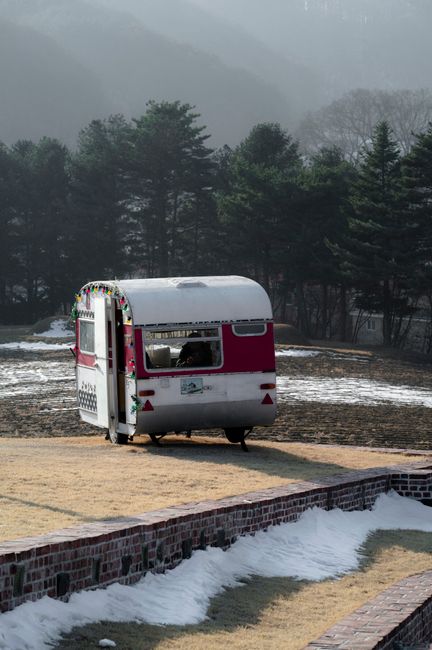
Travel trailer on a level gravel storage pad with wheel chocks and a fitted winter cover

RV Winterization Checklist: Get Your Camper Ready for Storage

Protect plumbing, prepare batteries and tires, and record every storage step with an RV winterization checklist tailored to your camper.

12 min read

A Seasonal Reminder to Get Your RV Storage-Ready

Turn winter-preparation advice into a practical checklist for your camper.

RVtravel’s headline “Follow these steps to prepare your RV for winter” puts a familiar seasonal task back on the camping agenda. The takeaway is straightforward: give your camper a proper storage day before freezing weather arrives. This RV winterization checklist turns that reminder into a system-by-system plan.

Winterizing is more than pouring pink fluid into a drain. It means removing or protecting water wherever it can remain, shutting down equipment correctly, and preparing the camper for weeks or months without regular use. A compact travel trailer and a motorhome with a washer, ice maker, and hydronic heating system need different procedures.

Use this guide as a task list, not a replacement for the owner’s manual. Gather the RV manual and instructions for the water heater, pump, filters, batteries, and specialty appliances before starting. Set aside a daylight work session, with time to pick up a missing fitting instead of improvising.

  • Start with plumbing, then move to appliances, electrical systems, tires, and the interior.
  • Record every bypassed valve, disconnected component, and removed part.
  • If a procedure is unclear or a component is inaccessible, have an RV technician handle that system.

1. Choose Your Winterization Date

Let temperatures and storage conditions set the schedule, not the calendar alone.

Finish before freezing conditions reach your storage location. Exposed lines, outside showers, and unheated compartments may approach outdoor temperatures even when the living area stays warmer. Do not assume a brief freeze is harmless or that an enclosed underbelly protects every component.

If another trip is on the calendar, decide whether you will use a manufacturer-approved cold-weather setup or winterize between trips. A heated cabin does not necessarily protect the pump, tank valves, or exterior fixtures. Do not rely on a portable heater in an unattended camper as your storage plan.

  • Outdoor storage with freezing weather: complete plumbing winterization before the first forecast freeze, then follow the manufacturer’s cover and snow-load guidance.
  • Wet, above-freezing storage: prioritize leak repairs, interior drying, ventilation, and moisture checks. Winterize plumbing if freezing remains possible.
  • Heated indoor storage: verify that every plumbing space stays above freezing and ask about heating interruptions. Winterization can provide a backup if heat is not guaranteed.
  • Intermittent winter trips: keep a winterization kit together and record when the water system returns to service so you know when protection must be restored.

Set two calendar reminders

Schedule the storage workday, then add a reminder several days earlier to review the forecast, manuals, supplies, and storage-site rules.

2. Choose a Method and Gather Supplies

Confirm whether your RV permits antifreeze, compressed air, or a combination.

The antifreeze method uses a winterization inlet or approved pump pickup to move RV plumbing antifreeze through designated water lines. The compressed-air method uses regulated air through an approved connection to clear water from those lines. Some manufacturers specify a combination, and some appliances require additional procedures.

Use only antifreeze labeled for RV or marine potable-water plumbing and compatible with your components. Never put automotive engine coolant in the freshwater system. Read the product instructions and protection rating: a burst-protection rating does not mean the fluid stays liquid at that temperature. Do not dilute it unless the label explicitly requires dilution.

For a conventional small RV with a bypassed tank-style water heater, 2 to 4 gallons is a useful shopping estimate, not a guaranteed requirement. Larger rigs and additional appliances may need more. Follow the specified procedure and keep a spare sealed gallon if supplies will be hard to find.

For compressed air, find the permitted winterization pressure in the RV and component instructions. Respect the lowest applicable limit. If you cannot establish the approved connection and pressure, do not borrow a generic setting or guess.

  • For either method: chemical-resistant gloves, safety glasses, a bucket, towels, labels, a marker, a flashlight, and the correct drain-plug tools.
  • For antifreeze: the specified quantity of potable-system RV antifreeze and a compatible pickup hose, winterization kit, or hand pump.
  • For compressed air: a compatible blowout adapter, regulator, accurate pressure gauge, and clean air source suitable for potable-water plumbing.
  • For the water heater: a manufacturer-specified replacement plug, seal, or anode rod if inspection shows one is needed.
  • For storage: appropriate wheel chocks, a tire-pressure gauge, a battery-care setup matched to its chemistry, and a breathable RV cover if recommended.

3. Drain Tanks and Prepare the Water Heater

Remove bulk water before protecting smaller passages and fixtures.

Empty black and gray holding tanks at an approved dump station. Flush them only as their instructions allow, then drain the rinse water. Keep sewage equipment separate from freshwater tools. Drain the freshwater tank and locate the hot- and cold-water low-point drains using the plumbing diagram.

Before draining the water heater, switch off every heating source, including electric, propane, and automatic controls as applicable. Let the water cool, disconnect the water supply, turn off the pump, and relieve pressure according to the heater manual. Do not remove a drain plug or anode rod from a hot or pressurized heater.

Drain a conventional tank-style heater using its specified procedure. Inspect the plug, threads, and anode if fitted. Tankless heaters and hydronic systems need their own winterization instructions. A tankless unit may retain water in small passages even after its drain is opened, so a tank-style checklist is not enough.

If the prescribed antifreeze method calls for a water-heater bypass, set it exactly as shown in the manual. The bypass prevents unnecessary filling of the heater, but it does not drain or winterize the heater itself. Photograph valve positions before and after changing them.

  • Disconnect and drain the drinking-water hose, pressure regulator, and external filter assembly.
  • Drain the freshwater tank, low-point drains, and water heater using their separate procedures.
  • Remove or bypass filter cartridges as instructed. Do not automatically pump antifreeze through them.
  • Leave drain valves and plugs in the manufacturer-specified condition for winter storage.
  • Tag the water-heater controls: “Do not energize until spring refill and verification.”

4. Protect Water Lines and Every Fixture

Work from a complete fixture list instead of stopping at the kitchen faucet.

For the antifreeze method, configure the approved pickup and valves, then operate the pump according to the manual. Work through every hot and cold outlet until the required antifreeze condition is reached, commonly a steady flow matching the product’s original color. Catch discharge where practical and handle it according to the label and local requirements. Follow any specified outlet order; lightly pink, diluted water is not proof of adequate protection.

For compressed air, use the approved inlet, regulated pressure, and opening sequence. Keep an outlet open as directed and clear every hot and cold branch. Clearing faucet lines does not automatically clear the pump, strainer, accumulator, inlet check valves, or appliance solenoids. Each needs its specified draining or protection procedure.

Do not casually press the city-water inlet check valve while the system is pressurized. Some manuals require a particular check-valve winterization step; others use a different arrangement. Follow the procedure precisely or leave it to a technician.

Protect sink and shower traps with RV antifreeze in the amount specified for the fixture and product. Around 1 cup per small trap is a common planning allowance, not a universal dose. Protect the toilet bowl seal and holding-tank components only as their manufacturers recommend.

  • Kitchen faucet: hot and cold sides, plus the pull-out sprayer.
  • Bathroom faucets and indoor shower: every valve, handheld hose, and showerhead.
  • Toilet: flush valve, supply line, and any separate hand sprayer.
  • Outside shower, outdoor kitchen, utility faucet, and exterior quick-connect water ports.
  • Water pump, strainer bowl, accumulator, low-point drains, and freshwater inlet components.
  • Refrigerator ice maker or water dispenser, washing machine, dishwasher, and drinking-water tap, if installed.
  • Black-tank flush connection and piping: follow dedicated instructions because the freshwater pump may not serve this system.

Count fixtures before starting

List every water outlet and appliance, then check off hot, cold, drain, and specialty procedures separately. A pink kitchen faucet does not prove the whole camper is protected.

5. Prepare Appliances, Batteries, Tires, and the Interior

Reduce moisture, unwanted power draw, and storage wear.

Empty and clean the refrigerator, freezer, pantry, and cooking area. Dry them thoroughly, then use the appliance’s storage latch or approved method to keep doors ventilated. Remove food, toiletries that could freeze, damp bedding, and loose liquids. Repair leaks before covering the RV; a cover cannot fix failed sealant.

Battery care depends on chemistry and equipment. Prepare lead-acid batteries as directed, including checking electrolyte only on serviceable flooded batteries. Lithium batteries may require a different storage state of charge and temperature range. Many cannot accept charging below freezing without approved low-temperature protection or heating.

If batteries stay installed, confirm what the disconnect switch actually isolates. Some devices remain connected and can drain the battery. Use only a charger or maintainer approved for the chemistry and installation. If removing a conventional negative-ground battery, follow the vehicle procedure, normally disconnecting negative first and reconnecting it last. Store batteries securely with terminals protected.

Check cold tire pressures against the RV and tire manufacturers’ storage guidance. Park on a stable, well-drained surface, use suitable chocks, and protect tires from prolonged sun exposure where recommended. Stabilizer jacks are not lifting equipment; do not use them to unload the tires unless the manufacturer explicitly permits it.

  • Shut down the furnace, refrigerator, water heater, and other appliances through their normal controls.
  • Close propane cylinder valves for storage as directed and follow the facility’s propane rules.
  • For motorhomes, follow separate chassis instructions for fuel, engine maintenance, and the starter battery.
  • Inspect roof edges, seals, vents, and compartments using appropriate access methods and approved repair materials.
  • Use purpose-made pest barriers only where permitted. Record any storage-only vent covers so they are removed before operation.
  • Choose a fitted, breathable RV cover if appropriate. Avoid a loose plastic tarp that traps moisture or rubs surfaces.
  • Keep required ventilation unobstructed and follow the manual for slide-out and leveling-system storage positions.

6. Verify the Work and Record Your Spring Restart Steps

Make the completed checklist useful now and when camping season returns.

Walk around the RV, open each storage compartment, and compare the work with your fixture list. Look for overlooked hoses, bottles, damp items, and unlocked compartments. Confirm the parking position, chocks, cover straps, and storage-site access arrangements.

If two people are working, divide responsibilities rather than duplicating effort. One person can handle plumbing and valve settings while the other tackles interior drying, tires, and supplies. Give each task one owner, then have the second person verify key items such as heater shutdown and exterior fixtures.

Keep the record in one place. Use CampMate to organize a reusable storage checklist and packing list for the winterization kit. Keep completion dates, valve photos, and appliance instructions alongside your maintenance notes so spring does not depend on memory.

Schedule periodic storage visits at an interval suited to your climate, facility, and equipment. Check for moisture, cover movement, tire-pressure changes, and battery issues. Follow the RV manufacturer’s snow-load guidance rather than assuming the roof can handle whatever the season brings.

  • Log the date, method, antifreeze product and quantity, and regulated air setting if used.
  • Record every bypass position, removed filter, disconnected battery, stored plug, and appliance-specific step.
  • List supplies needed before spring, including filter cartridges and required seals.
  • Note who completed and verified each task, especially procedures with multiple valves or connections.
  • Write the restart order: remove storage barriers, restore parts and valves, flush and sanitize as specified, check for leaks, and verify water-heater readiness before energizing. Tank-style heaters must be filled as directed.
“A good winterization checklist records both the action and the action that reverses it.”
— CampMate checklist principle

FAQ: RV Winterization Methods and Storage

Quick answers to common questions about antifreeze, compressed air, and winter trips.

  • Can I use automotive antifreeze in my RV water system? No. Use only a product labeled for RV or marine potable-water plumbing and approved for your components. Automotive engine coolant is not a substitute, even if the color looks similar.
  • Is compressed air enough to winterize an RV? Sometimes, if the manufacturer approves it and every component receives its required treatment. Traps typically still need RV antifreeze, while pumps, check valves, tankless heaters, and appliances may require separate procedures.
  • How much RV antifreeze should I buy? For a conventional small RV with a bypassed tank-style water heater, 2 to 4 gallons is a useful starting estimate. Actual needs depend on line length, appliances, and the specified method. Follow the manual and product instructions rather than a fixed gallon rule.
  • Should I pour antifreeze into the freshwater tank? Only if the manufacturer’s procedure explicitly requires it. Many RVs use a dedicated winterization inlet or pump pickup instead. Unnecessary tank filling increases product use and spring flushing.
  • Do I need to winterize in heated storage? It depends on whether every water-containing component stays above freezing throughout storage. Verify the facility’s conditions and your RV layout. Winterization provides a backup when continuous heat cannot be guaranteed.
  • When should I book professional winterization? Consider it for unfamiliar valve layouts, inaccessible components, hydronic systems, complex appliance plumbing, or unclear instructions. Request an itemized completion record and spring reversal notes.
  • Can I use the camper after winterizing? Yes, but using freshwater plumbing can undo its protection. For a dry trip, carry drinking water separately and follow the RV’s guidance for toilet and holding-tank use. Re-winterize any system returned to service before freezing storage.

Close the Door With a Clear Plan for Spring

A little documentation now makes the next camping season easier.

A reliable RV winterization checklist covers every water-containing component, follows model-specific instructions, and includes the rest of the camper. The finish line is not an empty antifreeze jug. It is a verified fixture list, properly stored batteries and appliances, and a dry, securely parked RV.

Before closing the door, leave a visible reminder that the water system is winterized and the heater must not be energized until its spring procedure is complete. Save your supply list, completion notes, and reversal steps together. When camping season returns, you will have a restart plan instead of a valve-position guessing game.

    Continue the journey

    Keep Your RV Storage Checklist Ready for Next Season

    Use CampMate to organize winterization supplies and a reusable task list, then keep your spring restart reminders with the plan.

    Related Articles

    Continue exploring camping tips and packing guides