
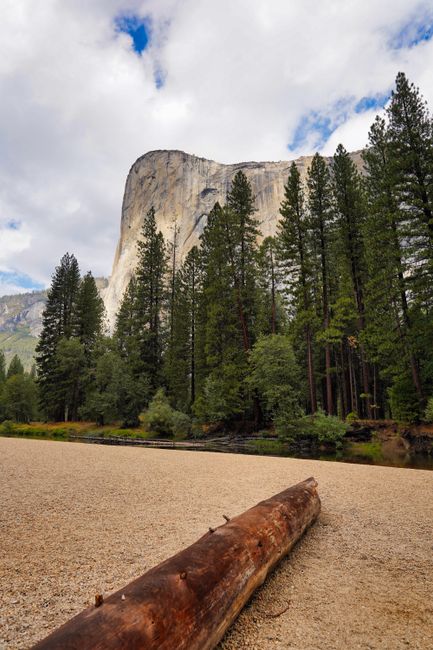
Granite cliffs and pine trees around a Yosemite Valley campground

Yosemite Camping Reservations: Booking and Arrival Guide

Crowding reports highlight why a campsite booking is only the start. Check Yosemite reservation windows, entry rules, arrival logistics, and transportation before building your park-day plans.

12 min read

Crowding Reports Put Yosemite Trip Planning in Focus

Reserve your overnight base first, then make a flexible plan for arrival and sightseeing.

An ABC7 Los Angeles headline about long waits and packed trails following the end of a Yosemite reservation system highlights a useful planning lesson: entering the park, securing a campsite, and finding daytime parking are separate tasks. Solving one does not automatically solve the others. The reservation system mentioned in that report should not be confused with campground bookings.

Start with Yosemite camping reservations rather than a long sightseeing wish list. Once you know where you will sleep, you can choose an entrance, estimate your arrival, and group activities around that base. Leave room for an entrance queue, a grocery stop, or a parking area that is already full.

That headline is context, not confirmation of the rules for your travel dates. This guide is a planning framework, not a live operating-status report. Check current entry requirements, campground release schedules, road conditions, and transportation service on the official National Park Service pages linked below before booking and again before departure.

    1. Separate Park Entry From Your Campsite Reservation

    Check overnight accommodation, park access, and entrance payment separately.

    A campground reservation secures an overnight site or camping space under that campground's rules. It does not replace the park entrance fee or an accepted entrance pass. If Yosemite requires a separate vehicle-entry reservation for your dates, check whether your specific overnight booking qualifies you for entry and what proof you must show.

    Do not assume a campsite outside the park provides the same entry eligibility as an in-park reservation. Likewise, an entrance pass, day-use reservation, shuttle ticket, or lodging booking does not give you permission to camp elsewhere. Camping is allowed only where the applicable rules permit it.

    Read the current NPS entry guidance at https://www.nps.gov/yose/planyourvisit/reservations.htm. Save any relevant instructions with your campground confirmation, including eligible dates, reservation-holder requirements, and the documents you need at the entrance.

    • Overnight booking: Where are you sleeping, for which nights, and with how many people and vehicles?
    • Park access: Is a separate entry reservation required for your dates, entrance method, or arrival time?
    • Entrance payment: Will you pay the applicable fee or use an accepted pass?
    • Activity permits: Does anything on your itinerary require its own permit or reservation?
    “Book the place you will sleep. Check the rules for getting there. Plan each day around a practical base.”
    — CampMate planning principle

    2. Verify Campground Booking Windows and Site Limits

    Match the actual site to your group, equipment, and vehicle before reservations open.

    Begin with the NPS campground overview at https://www.nps.gov/yose/planyourvisit/camping.htm and reservation guidance at https://www.nps.gov/yose/planyourvisit/campgroundreservations.htm. Follow the official links to Recreation.gov for your chosen campground. Seasonal opening dates, availability, and release rules vary, so one campground's calendar should not stand in for the whole park.

    Several Yosemite campgrounds have commonly used a monthly release at 7 a.m. Pacific on the 15th, up to five months ahead. Other campgrounds or inventory releases may use shorter rolling windows or different schedules. Confirm the exact release date, time, and eligible stay dates on the current listing rather than treating that familiar pattern as a park-wide rule.

    Before release day, sign into your Recreation.gov account and prepare a shortlist of suitable sites. Tent-only, walk-in, and RV-compatible sites meet different needs. Check occupancy, vehicle allowances, tent space, driveway dimensions, RV or trailer limits, and equipment restrictions. Do not assume hookups, potable water, or a dump station are available.

    For a group trip, use the site's stated limits rather than hoping everyone can fit into one reservation. If you need multiple sites, assign each booking lead a distinct acceptable target and coordinate before payment. Review cancellation and modification terms before booking, especially when considering alternate dates.

    • List two or three acceptable campgrounds and several suitable sites at each.
    • Measure your tent footprint and vehicle or RV setup before comparing site descriptions.
    • Check elevation, seasonal access, toilets, water availability, food storage, and distance from your main day-use area.
    • After booking, save the confirmation number, campground, site number, arrival and departure dates, and reservation holder.
    • Read check-in, checkout, late-arrival, and no-show instructions directly from the reservation.

    Set the reminder in Pacific time

    Create a calendar event using the campground's stated release time and time zone. Add an earlier reminder to review the listing and sign into your account. Preparation improves your booking process, but it does not guarantee a campsite.

    3. Allow Time for Entrance Queues and Campground Check-In

    Work backward from a comfortable setup time, not just the navigation app's estimate.

    Choose your entrance based on your starting point, campground location, and current road access. A route that looks shorter on a map may depend on a seasonal road. Check https://www.nps.gov/yose/planyourvisit/conditions.htm before committing, especially if your approach involves Tioga Road or another seasonally affected corridor.

    Build your arrival estimate from four blocks: driving time, stops, a buffer for entrance and park traffic, and the drive from the entrance to your campground. For a weekend or holiday approach, a couple of hours of flexibility can be a useful allowance. It is not a forecast of the queue, and no arrival time guarantees a quick entrance.

    If you reach the park before campsite check-in, follow the campground's instructions and use authorized day-use parking where available. Your site may still be occupied. If you expect a late arrival, read the procedure beforehand and follow any contact instructions. Do not depend on a last-minute call from an area with unreliable reception.

    Keep arrival day light. Buy groceries and fuel before entering when practical, eat a simple lunch, and choose one nearby walk after setup instead of another cross-park drive. Pack the first dinner where you can reach it without opening every storage bin.

    • Keep the reservation holder's ID, campsite confirmation, entrance pass, and any required entry confirmation together.
    • Download an offline map covering your approach route, park roads, and campground.
    • Keep headlamps, rain shells, drinking water, and the first meal accessible without unloading the entire vehicle.
    • Give every driver the exact campground and site number, not just a general Yosemite destination.
    • For separate vehicles, agree on a meeting place and fallback time before reception becomes unreliable.

    4. Plan One Main Area Per Day and Reduce Parking Moves

    A compact itinerary usually works better than a checklist spread across the park.

    Choose one main area for each day. From a Yosemite Valley campground, a Valley-focused outing can combine walking and available shuttle service without repeatedly moving your car. If your campsite is farther away, account for the full round trip before adding an evening activity.

    Check current routes, stops, hours, and service notices at https://www.nps.gov/yose/planyourvisit/publictransportation.htm. The Yosemite Valley shuttle can reduce driving when it is operating, but verify service for your dates. Do not assume every trailhead has a shuttle stop or that service runs late enough for your return.

    If you are camping outside the park, investigate YARTS using the official transportation guidance and the operator's current schedule. Confirm the route, stop location, service dates, ticket arrangements, entrance-fee treatment, and last return departure. A bus-based day works only when the timetable fits both ends of the trip.

    Build each day around one main outing and one nearby optional stop. Pack lunch so a full parking lot does not trigger a separate food trip. If an area is busy, shorten the plan or choose your backup rather than circling indefinitely. Park only in authorized spaces and keep roads and campsite access clear.

    • Per person: Bring a daypack, rain shell, insulating layer, hat, sunscreen, snacks, and packed lunch.
    • Water: For a moderate half-day outing, about 2 liters per adult can be a starting point. Adjust for heat, duration, individual needs, and verified refill locations.
    • Per group: Carry a downloaded route map, basic first-aid kit, and charged power bank. Each person should have a headlamp.
    • Before leaving camp: Set a turnaround time, confirm return transportation, and choose one nearby backup activity.
    • Packing shortcut: Keep day-use gear separate from the campsite kitchen so breakfast cleanup does not hold up departure.

    Use a park-once plan

    Write down your intended parking area, walking or shuttle connections, and return route. Choose one legal parking alternative before leaving camp. A day with fewer parking moves leaves more time for the views.

    5. If Campgrounds Are Full, Compare the Whole Trip

    A backup campsite needs to fit your commute, access requirements, and equipment.

    First compare other dates, shorter stays, and other suitable in-park campgrounds. Recheck official availability for cancellations without counting on one to appear. A date change may preserve your preferred location better than a distant campsite would.

    Next, compare established campgrounds outside Yosemite. Use the responsible public-land agency or campground operator to verify booking rules and facilities. A campground near an entrance can still be a substantial drive from your main sightseeing area, with entrance queues possible each time you return.

    Compare the complete cost: nightly charges, extra fuel, commute time, transportation options, and any different park-entry arrangements. Verify potable water, toilets, cooking restrictions, food-storage rules, and vehicle fit. Roadside parking or an unverified dispersed-camping location is not an automatic overflow campsite.

    • Alternate dates: Compare weekdays and another season while checking weather, campground opening dates, and road access.
    • Alternate in-park base: Check the drive to your main outing before accepting a different location.
    • Outside-park camping: Confirm the exact entrance route and realistic daily travel time.
    • Split stay: Allow for checkout, repacking, food storage, and the next campground's check-in.
    • No suitable option: Change your dates or accommodation plan rather than arriving without a lawful overnight arrangement.

    6. Pack for Your Campground, Forecast, and Group

    Build a Yosemite-specific checklist around the booked site's facilities and rules.

    For a two-night car-camping trip with four adults, start with shelter that fits the booked site, one sleep system per person, a compact shared kitchen, and compliant food storage. Campground elevation matters: a Yosemite Valley forecast may not reflect conditions at a higher campground.

    Yosemite's food-storage requirements cover more than groceries. Check https://www.nps.gov/yose/planyourvisit/bears.htm for current instructions on food, drinks, toiletries, trash, and other scented items. Use the provided food locker as directed, and check its dimensions before bringing a large cooler. Do not plan to leave food or scented supplies in your vehicle overnight.

    Assign one owner to each shared item and one person to track confirmations. CampMate can help organize trip details and packing assignments, but save essential documents and maps locally too. Every driver should have an accessible copy of the arrival information.

    • Shelter and sleep: Bring an appropriately sized tent or permitted tent combination, complete poles and stakes, four sleeping pads, and four sleeping bags suited to expected overnight temperatures.
    • Shared kitchen: Pack a stove permitted under current restrictions, sufficient compatible fuel for planned meals, a pot, a pan if needed, a lighter plus backup, and four bowls, mugs, and utensil sets.
    • Water: Bring four refillable bottles and a shared 10-liter container if useful for cooking and refills. That is storage capacity, not the group's total water requirement. Confirm potable-water availability.
    • Lighting and power: Pack four headlamps, a small campsite light, spare batteries or charging cables, and a charged power bank.
    • Food storage and cleanup: Use containers that fit the locker. Bring enough trash bags, a small washing basin, and supplies compatible with campground wastewater rules.
    • Cool-night module: Include a warm midlayer, warm hat, and dry sleep socks for each person. Add insulation based on the campground's forecast.
    • Rain module: Bring waterproof shells, a sound tent rainfly, protected bedding, and dry bags or waterproof clothing liners.
    • Warm-day module: Pack sun hats, sunscreen, and extra drinking-water capacity. Consider an earlier main outing when practical.
    • Final checks: Review entry rules, reservation details, road access, campground notices, fire restrictions, shuttle schedules, and the forecast shortly before departure.

    Assign shared gear by name

    Each camper handles their clothing, sleep system, water bottle, and headlamp. Named owners handle the tent, stove, fuel, cooler, cleanup kit, and documents. Ask everyone to confirm their items are packed, not merely available at home.

    FAQ: Yosemite Camping Reservations, Entry, and Parking

    Quick answers to common booking and arrival questions.

    • Does park entry include camping? No. Paying an entrance fee, holding a pass, or obtaining a required entry reservation does not reserve a campsite. Book your overnight stay separately.
    • Does a campground reservation cover the entrance fee? Do not assume so. Check current fee rules and your booking details, and bring an accepted pass if you plan to use one.
    • Does an in-park campsite remove the need for a separate entry reservation? It may qualify under an entry policy when one applies, but eligibility and required proof depend on the current rules. Verify your booking against NPS guidance.
    • Does a campsite guarantee parking throughout Yosemite? No. Follow your campsite's vehicle and parking limits. Your reservation does not reserve spaces at trailheads, visitor areas, or other day-use parking lots.
    • Do all Yosemite campgrounds open reservations five months ahead? No. Release schedules can differ by campground and inventory type. Check current NPS guidance and the individual Recreation.gov listing.
    • Can we leave food in the car overnight? Do not plan on it. Follow Yosemite's current food-storage requirements and use the campground food locker as directed, including for toiletries, trash, and scented items.
    • Can we rely on the shuttle instead of driving? Sometimes, if its operating routes and hours fit your plans. Confirm the current schedule, stops, and return options before leaving camp.

    Book Your Overnight Base, Then Keep the Days Flexible

    A confirmed campsite and a few good backups make planning simpler.

    Plan in this order: check your dates and entry rules, reserve a suitable campsite, save the booking requirements, choose your approach route, and build compact park days around your overnight base. Then pack for the campground's elevation, forecast, facilities, and food-storage rules.

    You cannot reserve a quiet entrance queue or guarantee a convenient day-use parking space. You can reduce unnecessary driving, keep documents ready, carry what you need, and give your group a clear fallback. That leaves more room for the enjoyable part: settling into camp and exploring Yosemite.

      Continue the journey

      Keep Your Yosemite Plan Together

      Use CampMate to organize campsite details, your arrival plan, and assigned packing items. Save essential confirmations and maps for offline access too.

      Related Articles

      Continue exploring camping tips and packing guides