
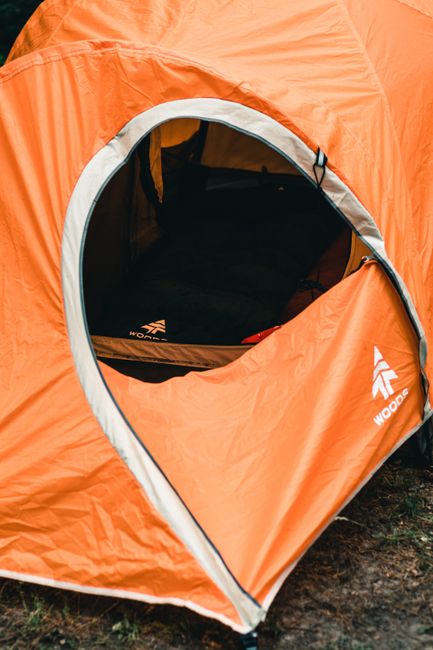
Camping tent with a full-coverage rainfly and open vestibule at a forest campsite

How to Choose a Camping Tent: Size, Weather, and Setup

Tent rankings are a useful starting point, but fit matters more than a winner’s badge. Compare sleeping space, rain protection, ventilation, packed weight, and setup with practical examples and a reusable buying worksheet.

15 min read

What the Latest Tent Rankings Mean for Your Next Trip

Use gear roundups to discover options, then check whether those tents suit your sleepers, weather, and travel style.

CleverHiker’s headline, “Best Camping Tents of 2026, 3,000 Nights of Testing,” puts extensive testing front and center. That is a useful starting point in a crowded gear market. Even so, a ranking cannot tell you whether your two wide sleeping pads fit inside a particular tent, whether its packed poles fit your backpack, or whether you can comfortably pitch it on your own.

The practical takeaway from any best-tent list is to build a shortlist, not skip the fit check. Testers have their own priorities, and the best option for their trips may not be the best option for yours. Look beyond the winner’s badge to the dimensions, weather design, included equipment, and trade-offs behind the recommendation.

Learning how to choose a camping tent starts with four questions: who will sleep in it, how will you transport it, what conditions do you expect, and who will set it up? Answer those before comparing extras. This guide uses hypothetical dimensions and weights to show how to evaluate candidates without treating a capacity label, waterproof rating, or advertised weight as the whole story.

    1. Match the Tent to Your Camping Style

    Decide which compromises matter before comparing individual features.

    For car camping, a few extra pounds usually matter less than usable headroom, convenient doors, and room to change clothes. For backpacking, every component travels with you, so complete carried weight, pole length, and packed bulk become central. A tent that serves both purposes can work, but it is a compromise rather than two specialized shelters in one.

    Write down your usual occupancy, transport method, and expected conditions. Then identify your non-negotiable requirements, such as fitting two rectangular pads, fitting inside your vehicle, or allowing a solo pitch. Eliminate tents that fail those requirements before debating pockets and colors.

    Include campsite space in your thinking. A large family tent may fit your group beautifully but need a substantial clear area once you add vestibules and guylines. Check campground tent-pad dimensions when available, especially if you regularly book compact sites.

    • Car camping: prioritize floor layout, sitting or standing room, dependable hardware, and a pitch you can complete with your usual setup team.
    • Backpacking: compare complete carried weight, packed dimensions, staking requirements, and the living space available with the fly closed.
    • Both: choose a shelter you would genuinely carry. Splitting a tall four-person car-camping tent between two hikers does not automatically make its weight or bulk practical.
    • Occasional backpacking: consider borrowing or renting a lighter tent rather than sacrificing comfort on every campground weekend.

    Use your usual trip as the baseline

    Choose for the conditions and group size you encounter most often. Rent or borrow for an unusual trip instead of buying around a once-a-year exception.

    2. Choose Tent Size Using Your Actual Sleeping Gear

    Capacity labels count sleepers, not comfort. Compare pads, floor dimensions, and usable height.

    A two-person tent may fit two narrow pads closely, while a four-person tent may leave little room for four wide pads. Compare the published floor plan with your actual pad or mattress dimensions, including any taper at the foot end. Total floor area alone can hide an awkward shape.

    Two 25-inch-wide pads require 50 inches of clear width wherever they sit. In a rectangular 54-inch-wide floor, that leaves four inches total, not four inches on each side. Sloping walls can reduce usable room around your shoulders, bedding, and feet even when the floor measurements look adequate.

    Length matters too. An 80-inch pad in an 84-inch-long tent leaves only four inches total beyond the pad. Allow room for sleeping-bag loft and avoid a layout that regularly presses bedding against the inner wall. Taller campers should check usable length at sleeping height, not just the floor’s longest measurement.

    Check peak height alongside roof shape. One tall point does not create standing room throughout the tent. For car camping, near-vertical walls can make changing clothes and moving around easier. For backpacking, enough room to sit up comfortably may be the more useful target.

    • Couple example: two 25 × 78-inch pads occupy 50 × 78 inches. A hypothetical rectangular 54 × 86-inch tent fits them closely; a 66 × 90-inch option provides more room for changing and small personal items. For car camping, that extra space may justify the added bulk.
    • Family example: two 25 × 78-inch adult pads plus two 20 × 60-inch child pads need 90 inches of width when arranged side by side. A hypothetical 96 × 108-inch floor leaves just six inches of spare width. A 120 × 120-inch floor offers more flexibility but increases packed size and pitching space.
    • For cots, measure the frame and feet, not just the sleeping surface. Check that the wall slope accommodates the cot’s height and that its feet are compatible with protecting the tent floor.
    • For an inflatable mattress, confirm its dimensions at full inflation. Its height brings the sleeping surface closer to sloping walls, which can make a seemingly roomy floor feel smaller.

    Tape out the floor

    Mark a candidate tent’s floor dimensions at home with painter’s tape. Place your inflated pads inside the outline, then add the personal items you expect to keep indoors. This checks floor space, not wall slope, so follow it with an in-person fit check when possible.

    3. Compare Rain Protection, Ventilation, and Seasons

    Judge the complete shelter design rather than choosing by one waterproof number.

    For regular wet-weather camping, look for broad rainfly coverage, protected entrances, a bathtub-style floor with raised edges, and clearly documented seam treatment. Check whether seams arrive taped or sealed, or whether the manufacturer requires you to seal them before use. A small roof cap over exposed fabric walls deserves closer scrutiny if frequent rain is part of your routine.

    Waterproof ratings are usually expressed as hydrostatic head in millimeters. Higher numbers indicate greater resistance to water pressure in that test, but they do not automatically make a whole tent better. Fly coverage, seams, fabric condition, pitch tension, and floor construction all affect performance. Ratings alone are not a complete durability comparison across brands.

    Ventilation matters even when the fly stays on. Look for protected fly vents and a design that allows air to enter low and escape high. Moisture from occupants and damp gear can condense inside a tent. Mesh and airflow help manage it, but no design can promise a condensation-free interior in every condition.

    A three-season tent generally targets spring, summer, and fall use, not every forecast within those months. Four-season shelters usually emphasize structural support and protection from wind and snow, often with less mesh and more weight. They are not automatically warmer or more comfortable for ordinary summer camping.

    • Warm-weather trips: prioritize substantial mesh, cross-ventilation, and fly vents that remain useful with the doors closed. A removable fly is a bonus, not a substitute for ventilation under rain coverage.
    • Frequent rain: prioritize broad fly coverage, sheltered entrances, documented seam treatment, and vestibules that keep wet footwear outside without blocking access.
    • Cool, breezy shoulder-season trips: look for controllable ventilation, secure fly attachments, and usable guy-out points. Keep enough airflow to manage moisture rather than closing every opening by default.
    • Snow-season trips: choose a shelter specifically intended for the expected conditions instead of treating a three-season label as a year-round promise.

    4. Check Doors, Vestibules, and Interior Layout

    Small design choices become noticeable when several people share a tent.

    Two doors can be especially useful for a couple because either sleeper can get out without climbing over the other. In a family tent, a broad entrance and a clear route between sleeping pads may matter more than door count. Check door positions against your intended sleeping arrangement.

    Vestibules are covered spaces outside the inner tent, usually formed by the rainfly. Their advertised area is useful only if the shape accommodates your gear without blocking the entrance. One deep vestibule may suit two packs; two smaller ones may give each camper a convenient spot for footwear. Compare the floor plan, not just the square-foot figure.

    Interior pockets keep glasses and headlamps off the floor. A gear loft can help organize small items but may reduce headroom. Dividers provide visual separation rather than meaningful sound insulation. Also inspect zippers, door tiebacks, and whether the inner and outer doors are easy to reach.

    Evaluate comfort with the fly closed. An open-door display can make a tent feel much roomier than it will during a rainy evening. Sit inside, reach the pockets, and picture where damp jackets and everyday essentials will go.

    • For two adults: consider two doors, a pocket within reach of each sleeping position, and convenient vestibule space for wet footwear.
    • For a family: prioritize a clear exit route, reachable storage, and enough floor flexibility to rearrange pads as children grow.
    • For shared tents: agree on which items stay inside and which belong in weather-protected outside storage. Do not count vestibules as extra sleeping capacity.
    • Do not cook inside the tent or vestibule. Store food and scented items according to campground or land-manager guidance rather than wherever the tent has spare space.
    “Choose the layout you can live in with the fly closed, not just the one that looks spacious with every door open.”
    — CampMate tent-buying rule of thumb

    5. Compare Setup Effort and the Complete Packed Kit

    Evaluate everything you will transport and pitch, not an isolated weight or setup claim.

    Freestanding tents can usually hold their basic shape without stakes, but still need appropriate anchoring and often stakes to tension the fly and vestibules. Semi-freestanding and non-freestanding designs depend more on staking for their usable shape. These labels describe structure, not a guarantee of easy setup or suitability for every campsite.

    Clip-on bodies, clear pole markings, and straightforward fly attachments can simplify pitching. Large cabin tents may offer generous standing room but require more reaching and coordination. Instant-style frames reduce separate pole assembly, yet can create a longer, heavier packed bundle.

    For backpacking, distinguish minimum or trail weight from packaged weight. Definitions vary, so compare component lists rather than assuming the labels mean the same thing across brands. Include the body, fly, poles or required trekking poles, stakes, guylines, bags, and any groundsheet you intend to carry.

    Packed length matters as well as weight. A shelter may be light enough for your trip but awkward to fit in a small pack because of its pole sections. For car camping, measure the packed bundle against the cargo space remaining after bedding, food, and other gear.

    • Verify what is included: tent body, rainfly, complete pole set, stakes, guylines, carry bags, and any repair sleeve. Do not assume a footprint is supplied.
    • Read the pitching instructions to count anchoring needs. If a tent needs four corner stakes, two vestibule stakes, and four guyline stakes for your intended setup, plan for ten suitable stakes before adding spares.
    • For that ten-stake example, two compatible spare stakes provide a modest backup. Different tents and ground conditions may require different quantities or stake types.
    • Check whether the tent can be pitched with the fly protecting the inner, if that matters for your rainy-weather trips. Do not assume every double-wall design supports that sequence.
    • Assign one person responsibility for checking the complete shelter kit. If backpackers split components, confirm that the fly, poles, body, and stakes are all present before departure.

    Test your real setup team

    If one adult usually pitches while another handles family tasks, test a one-person pitch. A setup that works smoothly with three helpers may not match your normal arrival routine.

    6. Use a Buying Worksheet and Practice Pitch

    Make the trade-offs visible, then test the shelter as you will actually use it.

    Compare two or three candidates using the same fields. Check current manufacturer specifications and pitching instructions, especially for dimensions, included accessories, and weight definitions. Retailer summaries can omit details, and similarly named tent versions may differ.

    First mark each requirement as pass, uncertain, or fail. A failed pad fit should outweigh a long list of convenient pockets. Resolve uncertain essentials before buying, then rank the remaining options by your actual priorities rather than giving every feature equal weight.

    For a crossover camping example, suppose two hypothetical tents both fit your pads. One weighs 5 pounds complete and measures 54 × 88 inches; another weighs 8 pounds complete and measures 66 × 90 inches. Shared equally between two hikers, those loads average 2.5 and 4 pounds per person. Real component splits may be uneven, but the calculation makes the trade-off clearer: the lighter option favors repeated hiking miles, while the roomier one favors campground comfort.

    Compare total purchase cost, not just the tent’s price. Add any required footprint, extra stakes, seam treatment, or separately sold setup accessories. For a used tent, inspect the poles, zippers, seams, floor, and coatings, and ask to see it pitched if possible. Sticky, peeling, or flaking coatings deserve particular attention.

    Before the first trip, pitch your chosen tent with the fly, vestibules, and guylines fully configured. Time the process without rushing, inflate every pad, close the doors, and have everyone sit inside. Check vents and zippers, then confirm that the complete kit fits back into its transport bags. Review return conditions before using a new purchase outdoors.

    Keep the shelter requirements with your trip plan in CampMate: intended occupants, required components, and who is bringing the tent. A specific packing reminder is much more useful than a checklist entry that simply says “tent.”

    • Trip profile: usual number of sleepers; car camping, backpacking, or both; typical rain, heat, and wind exposure; campsite space.
    • Sleeping fit: floor length; width at head and foot; pad or mattress dimensions; wall slope; peak height; usable sitting or standing area.
    • Weather design: rainfly coverage; seam treatment; floor construction; protected vents; entrance coverage; suitability for expected conditions.
    • Daily comfort: door count and position; vestibule shape; pockets; clear exit route; usable room with the fly closed.
    • Transport and setup: complete carried weight; packed length and diameter; required stakes; helper requirements; included and extra-cost components.
    • Total cost: tent price plus necessary accessories and any preparation required before the first trip.
    • Final decision: non-negotiables passed; largest compromise; unanswered questions; result of the practice pitch.

    FAQ: Common Camping Tent Buying Questions

    Quick answers about capacity, footprints, waterproof ratings, and budget.

    • Should I buy a tent rated for more people than my group? Often that improves car-camping comfort, but it is not a universal rule. Compare actual floor dimensions with your pads first. Backpackers may prefer a closer fit to reduce weight and bulk.
    • Do I need a tent footprint? Not always. A compatible footprint can reduce abrasion and keep the underside cleaner, but it adds cost and weight. Follow the manufacturer’s guidance, and keep any groundsheet within the floor outline so exposed edges do not collect rain beneath the tent.
    • What waterproof rating should I look for? There is no single number that guarantees a good tent. Compare fly and floor ratings alongside coverage, seam treatment, construction, and intended conditions. A higher rating cannot compensate for poorly protected entrances or an unsuitable pitch.
    • Is a four-season tent better than a three-season tent? Not for every trip. Four-season designs generally prioritize wind and snow performance. For typical campground use in mild conditions, a well-ventilated three-season tent is often more comfortable.
    • Where should I spend more? Prioritize adequate sleeping space, weather protection suited to your trips, dependable poles and hardware, and manageable setup. Extra organizers and dividers come after those basics. Include necessary accessories in your budget.
    • Can one tent handle car camping and backpacking? Yes, if its complete carried weight, packed size, and living space meet both needs. Be honest about the compromise. A tent you consistently leave behind because it is too bulky is not a useful backpacking option.
    • How can I check whether a tent will fit before buying? Compare its floor plan with your inflated pads, tape out the dimensions at home, and inspect a pitched example when possible. Floor measurements cannot fully show wall slope, so an in-person check is especially useful for tall campers, cots, and thick mattresses.

    Choose for Your Trips, Not Just the Rankings

    The best purchase is a shelter that fits your group and has trade-offs you understand.

    The latest tent rankings can introduce worthwhile options, but your shortlist should start with your trips and sleeping equipment. Confirm that your pads fit, the weather design suits your usual conditions, and the packed shelter works with your transport. Then compare the features that make daily camp life easier: doors, vestibules, storage, and headroom.

    Finish with a complete practice pitch using your normal setup team. A tent that fits your group, includes the components you need, and goes up without a puzzle-solving session is a stronger choice than one selected on capacity or ranking alone. Once those basics work, you can get back to the enjoyable decisions, such as where to camp next.

      Continue the journey

      Keep Your Tent Plan With Your Trip

      Use CampMate to keep shelter gear and trip planning together, with clear reminders of what to bring and who is bringing it.

      Related Articles

      Continue exploring camping tips and packing guides