
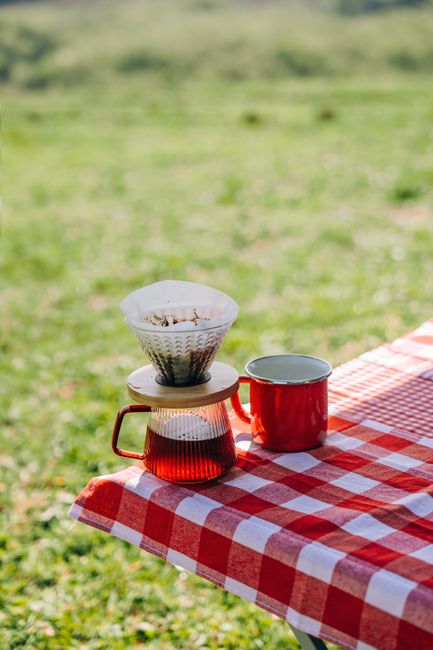
Camping coffee maker setup with a kettle, pour-over brewer, enamel mugs, and a sealed coffee container on a picnic table

How to Choose a Camping Coffee Maker

Portable coffee brewers are getting review attention, but the best choice starts with your campsite routine. Compare methods, plan quantities, and build a kit that is easy to pack and clean.

13 min read

Camping Coffee Makers Get the Review Treatment

A portable-brewer roundup offers a useful starting point, but your morning routine should guide the purchase.

ENDURO Mountainbike Magazine’s review of eight camping coffee makers puts portable brewing in the spotlight. A roundup can help you discover options, but before comparing individual products, answer a simpler question: how much effort do you want between unzipping your sleeping bag and holding a warm mug?

A camping coffee maker needs to fit your group size, heat source, packing space, and tolerance for cleanup. A tiny brewer can make excellent coffee for one person but become a bottleneck for four. A large percolator can serve everyone together, yet feel unnecessarily bulky on a backpacking trip.

Rather than turn that review coverage into another product ranking, this guide focuses on choosing a complete setup. Start with equipment you already own, calculate your breakfast quantities, and buy only what solves a real problem.

    1. Start With Group Size, Mug Volume, and Packing Space

    Count coffee drinkers, measure their mugs, and decide whether everyone needs a cup at once.

    Treat a six-cup label as a starting point, not a promise of six full camping mugs. Manufacturers may use much smaller cup sizes than your 350 ml insulated mug. Compare capacity in milliliters or fluid ounces, and distinguish the brewer’s total volume from its usable brewing capacity.

    Next, consider timing. Two relaxed campers can share a single-serving brewer. Four people trying to leave camp together will usually appreciate a larger batch or a thermal carafe that keeps the first batch warm.

    Choose the coffee style you enjoy, too. Paper-filtered pour-over generally produces a cleaner cup. A French press delivers more body and some sediment. An AeroPress offers flexible strength in small batches. Percolators suit campers who enjoy a robust, traditional pot, while instant coffee removes most brewing steps.

    • Solo backpacker: prioritize packed weight, few loose parts, and minimal washing water.
    • Couple car camping: look for enough usable capacity for about 600 ml of brewing water, plus the space required for grounds and brewing.
    • Four coffee drinkers: start with about 1.2 liters of brewing water for four approximately 250 ml servings, allowing for water retained by grounds.
    • Mixed preferences: bring clearly labeled decaf or instant portions rather than a second complete setup.
    “Choose for the busiest morning of the trip, not just the first relaxed cup.”
    — CampMate planning principle

    2. Compare the Main Camping Coffee Methods

    Assess the whole system, including its kettle, filters, and serving vessel.

    The capacities below are planning ranges, not specifications for every model. Check usable capacity, filter compatibility, and packed dimensions before buying. A French press needs space for grounds and the plunger, so its nominal volume is not its finished-coffee yield.

    | Method | Typical batch capacity | Extra equipment | Heat or power needs | Cleanup | Packed size | |---|---|---|---|---|---| | Pour-over | About 250 - 500 ml for a small dripper; larger models vary | Matching filters, mug or server, kettle or pouring pot | Separate hot-water source | Remove filter and grounds; wipe or rinse dripper | Small; folding models pack flatter | | French press | Commonly 350 ml - 1 liter nominal capacity | Coarse grounds, kettle or pot, stirring utensil | Separate hot-water source unless approved for direct heating | Remove grounds; clean mesh and plunger | Medium to bulky | | AeroPress | Roughly 200 - 300 ml per standard-size batch, depending on recipe; larger versions differ | Compatible filters and a sturdy, compatible mug | Separate hot-water source | Eject grounds puck; wipe seal and rinse as needed | Compact, with several small parts | | Stovetop percolator | Often labeled 4 - 8 cups; actual volume varies | Basket, stem, suitable grounds; optional compatible filter | Compatible stove or another manufacturer-approved heat source | Clean basket, pot, stem, and lid | Bulky, but no separate brewing kettle needed | | Instant coffee | One serving per mug | Mugs, measured coffee, spoon if needed | Hot water only | Mug and spoon | Smallest; no dedicated brewer |

    For pour-over, a gooseneck kettle is helpful but not essential. An ordinary camping kettle with a controllable stream can work well. For a French press, favor stainless steel or another durable construction over glass if your gear travels loose in a storage bin.

    Treat a standard AeroPress as a small-batch brewer. Brewing concentrate and diluting it can work, but use a suitable recipe rather than overfilling the chamber. Check that your mug opening fits the brewer and provides a stable base before pressing.

      Try the no-new-equipment option

      If you already carry a pot and mugs, try instant coffee before buying a brewer. Preportion one serving per person per morning, plus two spare servings for the group. Start with the brand’s directions and adjust at home.

      3. Match the Brewer to Your Stove, Power, and Weather

      A convenient brewer needs a compatible way to heat water.

      Pour-over, French press, AeroPress, and instant coffee all need a separate hot-water source. If you already carry a cooking pot, start there. Check that it pours neatly enough for your chosen method and holds the batch without filling to the brim.

      A percolator sits directly on a compatible heat source. Check its base against your stove’s pot supports, keep handles away from flames, and follow both manufacturers’ instructions. Do not put an ordinary French press or plastic brewer directly on a burner.

      For an electric coffee maker, compare its nameplate wattage with the campsite supply and your RV’s available capacity, including other appliances running at the same time. For battery operation, check both inverter output and usable battery energy.

      As an illustration, a 1,000-watt machine running continuously for six minutes uses about 100 watt-hours before inverter losses. Actual machines may cycle or use additional energy to keep coffee warm. Enough battery energy does not guarantee that an inverter can supply the required operating power.

      • Cold mornings: pack insulated mugs and, for shared batches, a thermal carafe. Prewarm them if your water budget allows, and choose stove fuel suitable for expected temperatures.
      • Windy mornings: choose a stable, sheltered outdoor cooking position. Use only manufacturer-approved wind protection; do not wrap a canister stove in a windshield that can overheat its fuel canister.
      • Wet mornings: keep grounds and paper filters in separate waterproof containers, with the coffee kit accessible without unpacking bedding.
      • Limited water: favor instant coffee or paper-filtered brewing, and budget cleanup water separately.
      • Powered pitches: verify that electricity is included, follow campground electrical rules, and keep connections dry. Pack a few instant servings as backup.

      Keep fuel-burning equipment outside

      Use combustion stoves outdoors, never inside a tent, vehicle, or enclosed shelter. Follow the stove manufacturer’s placement, clearance, and ventilation instructions.

      4. Calculate Coffee, Water, and Batch Capacity

      Plan with brewing-water volume, then allow for the water that stays in the grounds.

      For pour-over or French press, start with about 60 g of ground coffee per liter of brewing water and adjust to taste. This is a starting ratio, not a universal recipe. Use a tested AeroPress recipe or the percolator manufacturer’s guidance for those methods.

      Brewing-water volume is not finished-coffee volume. Grounds often retain roughly twice their weight in water, although this varies by method. A batch using 600 ml of water and 36 g of coffee might yield around 530 ml in the cups rather than a full 600 ml.

      For two people wanting approximately 250 ml each, start with 600 ml of brewing water and 36 g of coffee per breakfast. Choose a brewer with enough usable capacity or make two smaller batches. Two mornings require 72 g of coffee; packing 90 g adds a modest reserve. Budget roughly 1 liter of potable water per morning for brewing, a small rinse, and some margin, separate from other drinking and cooking water.

      For four coffee drinkers wanting approximately 250 ml each, start with 1.2 liters of brewing water and 72 g of coffee. A nominal 1-liter French press cannot handle that entire batch. Make two batches using 600 ml of water each and transfer the first to a thermal carafe, or choose a larger compatible brewer.

      For those four drinkers over two mornings, pack 180 g of coffee, including a 36 g reserve. Allow about 2 liters of potable water per breakfast for coffee, modest cleanup, and margin. Increase that allowance if your cleaning routine uses more.

      Count actual coffee drinkers, not everyone on the trip. Add tea, hot chocolate, and oatmeal water separately. With one burner, coffee and breakfast may need to take turns, so rehearse that sequence before departure.

      • Measure mug capacity at home rather than guessing from appearance.
      • Label coffee portions by batch, such as “Morning 1, batch A: 36 g.”
      • Count filters by brewing cycle, not drinker. Two filtered batches each morning for two mornings require four filters; pack at least two spares.
      • Check kettle capacity as well as brewer capacity. A large brewer will not eliminate repeat heating if your pot holds only 400 ml.

      5. Compare Total Cost, Cleanup, and Waste

      The cheapest brewer is not always the cheapest complete setup.

      Compare the cost of the brewer, filters, kettle, serving vessel, grinder, and replacement parts. As broad budgeting allowances in US dollars, not current product quotes, a basic manual brewer might cost roughly $10 - 60, while a durable larger press or percolator might run around $30 - 100 or more. Premium designs can exceed those ranges, and accessories add up.

      A grinder is optional. For a short trip, grind at home close to departure and seal measured portions in an airtight container. You save packing space, noise, and a breakfast task without giving up freshly brewed coffee.

      Cleanup matters as much as flavor. Paper filters let you remove most of the mess in one movement. French press grounds cling to the vessel and mesh, while percolators add a basket and stem to wash. Reusable filters reduce disposable filter waste but need cleaning water.

      Pack out grounds and used filters in a sealed waste bag unless the campground provides an approved collection system. Do not scatter or bury grounds, or rinse them into campground sinks, drains, streams, or lakes. Scrape or wipe equipment first, then dispose of wash water according to local rules.

      Instant sachets keep washing simple but create wrappers. A small sealed jar of instant coffee can reduce individual packaging.

      • Cleanup kit: pack a small scraper or spoon, a wiping cloth, a sealable grounds container or waste bag, and a spare waste bag.
      • Daily supplies: include measured coffee, compatible filters, and any milk, creamer, or sweetener your group actually uses.
      • Milk storage: keep perishable milk properly chilled and check storage instructions for shelf-stable alternatives after opening.
      • Before buying: confirm that replacement filters, seals, and other essential parts are readily available.

      6. Choose a Simple Setup for Your Trip

      Pick one main method and make responsibility for the complete kit clear.

      These setups are starting points, not product rankings. Choose the one that serves your group with the fewest repeated steps and the least equipment you will otherwise leave unused.

      On shared trips, assign responsibility for the brewer and kettle, coffee and filters, and water and cleanup supplies. Have each camper bring a mug. Check that the filters, press parts, kettle, and serving vessels fit together before packing.

      Keep the shared kit together on your CampMate packing list. A note such as “four drinkers, two mornings, 180 g coffee, four batch filters plus two spares” is more useful than an item labeled simply “coffee.”

      • Solo backpacking: an existing pot, mug, and instant coffee keep equipment to a minimum. Choose a lightweight pour-over if filtered ground coffee is worth the extra handling.
      • Couple car camping: use a small pour-over for two batches or a durable press that accommodates 600 ml of brewing water plus grounds and the required headspace. Start with 36 g of coffee per shared breakfast.
      • Four coffee drinkers: choose a sufficiently large percolator or brew two batches into a thermal carafe. Check actual volume rather than trusting cup labels.
      • RV with reliable hookup power: use your familiar electric machine if it fits the space and electrical supply. Secure it for travel and pack instant coffee for unpowered stops.
      • Mixed-caffeine group: make the shared regular batch and offer decaf instant or a separate labeled portion to avoid another full brewing cycle.

      Camping Coffee Maker FAQ

      Quick answers to common campsite brewing questions.

      • What grind size should I bring? Start with medium grounds for pour-over and coarse grounds for French press. AeroPress recipes vary, while percolators commonly use medium-coarse to coarse grounds. Follow your brewer’s instructions and test the exact coffee at home.
      • Can I use any paper filter? No. Match the filter’s shape and size to the brewer. Pack one for each brewing cycle plus at least two spares, and keep them dry.
      • Can I use an electric coffee maker at a campsite? Yes, if suitable power is available and the appliance can be used according to its instructions. For battery operation, check inverter wattage, usable battery energy, conversion losses, and other electrical loads.
      • How can I make coffee without a dedicated brewer? Instant coffee needs only potable hot water and a mug. You can also steep grounds directly in a pot, let them settle, and pour gently, but expect sediment and more cleanup.
      • Where should used coffee grounds go? Pack them out in a sealed waste container unless the campground provides an approved collection option. Keep grounds out of campground drains and natural water sources.
      • Do I need boiling water? Not always. Many methods work well with water just off the boil, while some recipes specify lower temperatures. Start with potable water and follow the recipe. Coffee brewing is not a substitute for treating unsafe water.

      7. Test Your Coffee Routine Before You Leave

      One practice breakfast can reveal more than another round of gear comparisons.

      Make a campsite-style breakfast at home using only the pot, brewer, mugs, and utensils you intend to pack. Measure the water, weigh the coffee, and count how many batches your group needs. Then clean everything using your planned camping water allowance.

      If the routine feels cumbersome in your kitchen, simplify it before heading out. A larger batch, premeasured grounds, or instant coffee may help more than a premium brewer. The right camping coffee maker delivers a satisfying cup without turning the morning into a kitchen shift.

        Continue the journey

        Keep Your Coffee Kit Together

        Add your brewer, measured coffee, filters, mugs, and cleanup supplies to your CampMate trip packing list so your morning essentials are ready to go.

        Related Articles

        Continue exploring camping tips and packing guides