
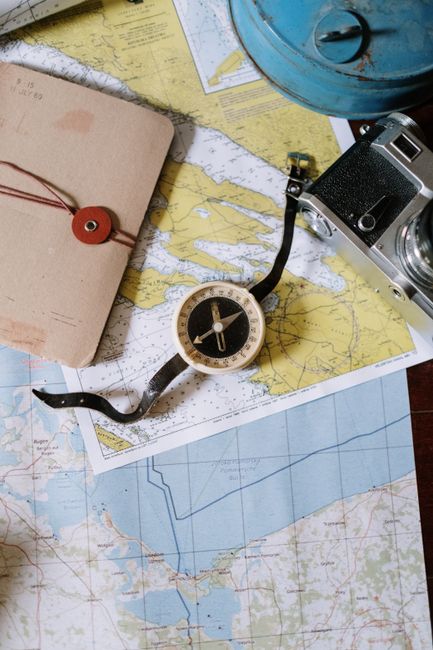
A tidy campsite dashboard concept featuring a notebook, map, compass, and labeled gear bins on a picnic table

Camping Trip Planner Checklist: Organize Dates, Campsite Details, and Packing Progress in One Dashboard

Use this camping trip planner checklist to organize your trip details and transform your plan into an easy-to-track packing workflow with clear responsibilities, item quantities, and weather-ready modules.

11 min read

Intro: The One-Page Plan That Keeps Your Camping Trip Calm

An effective camping trip plan is not a lengthy document but a single dashboard answering key questions during packing, travel, and camp setup.

Most camping 'forgot something' moments happen not because of missing gear, but because the plan is scattered across emails, texts, and notes apps that may not be shared or accessible.

This camping trip planner checklist is designed to live as one dashboard. Start by capturing the trip card with dates, destination, and attendees. Next, lock in campsite details, then add a simple itinerary with daily anchors. Finally, convert the plan into a packing workflow you can track by category, quantity, and owner.

If you use CampMate, you can create one trip and keep all these fields, your packing list, and progress in the same place. If not, the same structure works in any planner. The key is to plan first, then pack.

  • Avoids long destination research, gear rabbit holes, and complicated schedules.
  • Delivers precise fields to prevent last-minute confusion plus a packing progress system that works for groups.
“If it is not written where everyone can see it, it is not planned.”
— Seasoned group-trip organizers

Set a 20-Minute Planning Timer

Complete the first pass covering your trip card, reservation, and arrival plan within 20 minutes. You can refine details later, but these key pieces eliminate most day-of stress.

Start with the Trip Card: Dates, Destination, and Who’s Going

Your trip card is the dashboard’s top section. It should be easy to scan and complete enough for anyone in the group to answer basic questions without needing to message you.

Create a single trip card for quick reference while packing or on the road. In CampMate, this is the first step, and everything else attaches to it. Specificity ensures the plan survives handoffs between people.

  • Trip name: Use a functional name like “Pine Ridge State Park, Loop B, Site 24.”
  • Dates: Departure and return days plus check-in and check-out times if known.
  • Destination: Include park name, campground, site number, and exact address or GPS coordinates.
  • Trip type tag: Car camping, walk-in, canoe-in, RV, or backpacking (affects packing quantities).
  • Group roster: Names and roles such as driver, cook lead, gear lead, kid gear, dog gear.
  • Vehicles: Number of vehicles and license plates if required for reservations.
  • Communications: Who has spotty service and who has offline maps downloaded.
“Name the trip like you will search for it later.”
— CampMate workflow principle

Add a Minimum Viable Plan Note

Include a sentence defining success, for example: “Arrive before dark, hot dinner night one, easy breakfast, short hike day two.” This helps you say no to extra tasks that do not matter.

Lock in Campsite Details: Reservation Info, Check-In Rules, and Arrival Plan

This section prevents last-minute email digging or guessing about arrival times and gate codes.

Copy reservation details into your dashboard so they are accessible even offline. Then add an arrival plan considering daylight, quiet hours, and realistic camp setup timing.

Focus on operational details that impact timing, packing, and arrival responsibilities rather than travel guides.

  • Reservation confirmation: Number, booking platform, and name on the reservation.
  • Payment status: Paid in full, deposit paid, balance due on arrival, or cash-only office.
  • Check-in/check-out: Times, after-hours procedures, tag or key pickup location.
  • Gate and access: Gate code, entry PIN, or cell service needed for access.
  • Campsite constraints: Max vehicles, tents, generator rules, quiet hours, fire and pet rules.
  • Site features: Picnic table, fire ring, bear box, food locker, water spigot, electricity, shade, tent pad size.
  • Water and toilets: Potable water availability, distance to spigot, flush vs vault toilets, shower tokens or quarters.
  • Trash and recycling: On-site bins, pack-it-out policies, nearest disposal site.
  • Arrival plan: Target arrival time, last grocery stop, who carries the setup kit in an easy-to-reach spot.
“Plan for the first 30 minutes at camp, not just the drive.”
— Field-tested setup advice

Create a Gate-To-Camp Checklist

List the first 5 actions after arrival, for example: check in, hang tag, find site, confirm fire rules, set up lighting. This keeps everyone productive while orienting the group.

Build a Simple Itinerary: Driving Notes, Key Stops, and Daily Anchors

A brief itinerary reduces decision fatigue and helps pack the right items for the trip’s flow.

Keep the itinerary focused on how you get there, must-do times, and a default plan if the group splits.

Keep it short enough to read on a phone. In CampMate, keep it beside your packing list for easy reference.

  • Driving notes: Primary and backup routes, last reliable fuel stop.
  • Key stops: Grocery, ice, water fill, firewood (if allowed), restroom stops (especially with kids).
  • Daily anchors example:
  • Day 1: Arrive, set up, dinner, sunset walk.
  • Day 2: Breakfast, main activity window, quiet hour reset, dinner, stargazing.
  • Day 3: Pack down, site sweep, checkout, lunch stop.
  • Permits and timed entries: When and where to show up plus necessary ID.
  • Local rules affecting timing: Fire restrictions, quiet hours, day-use parking limits.
“Anchors beat schedules. Protect dinner and daylight, and the rest falls into place.”
— Group-trip planning mindset

Write One Default Meetup Rule

Example: “If we split up, meet back at camp at 5:30 pm for dinner prep.” This avoids the classic 'Where is everyone?' loop.

Turn Your Plan Into a Packing Workflow: Categories, Quantities, and Checkoffs

Packing is easier when your list matches how you load gear and use it at camp, organized by category with quantities tied to people, nights, and meals.

Convert your plan into a checkable packing workflow including quantity, unit, and notes to avoid duplicates or omissions.

CampMate lets you build packing lists inside the trip and check items off as you go. Whether or not you use CampMate, this structure makes packing progress tangible.

  • Core categories (keep consistent across trips): Shelter, Sleep, Kitchen, Food, Water, Clothing, Hygiene, Lighting and Power, Tools and Repair, Safety and Navigation, Camp Comfort, Optional Fun, Pet/Kid modules.
  • Quantity rules:
  • Sleep system: 1 sleeping bag, pad, and pillow (or stuff sack pillow) per person.
  • Shelter: 1 tent per group of sleepers, 1 footprint or groundsheet per tent, 8 - 12 stakes per tent (model dependent), 1 mallet/hammer per group.
  • Lighting: 1 headlamp per person plus 1 lantern per camp; add spare batteries per headlamp for weekend trips.
  • Water: 2 - 4 liters per person per day depending on heat and activity; note refill plans if potable water is on site.
  • Kitchen: 1 stove per group or per 4 people, 1 fuel canister per 2 nights (adjust for cold), 1 lighter plus 1 backup stored in a waterproof container.
  • Food: Write meals as modules (e.g., “Dinner 1: tacos” with ingredient checklist) to spot missing items easily.
  • Checkoff labels: Include storage location (garage bin, gear closet) to speed retrieval.
“If you cannot count it, you cannot track it.”
— Packing list rule for groups

Pack in Layers: Load, Reach, Wear

Label items as Load (stay in bins), Reach (needed on arrival like headlamps and tents), or Wear (worn on your body). This turns packing progress into a real loading plan.

Assign and Share: Who Brings What, Communal Gear, and Optional Items

Group trips run smoothly when every item has an owner, communal gear is consolidated, and optional items are clearly labeled to avoid crowding essentials.

Assignments reduce duplicates and protect essentials. Split gear into three lanes: personal, communal, and optional.

CampMate supports a shared packing list where items are assigned so everyone sees one source of truth with progress updates.

  • Personal lane: Each person packs their sleep system, clothing, toiletries, meds, headlamp, water bottle, snacks.
  • Communal lane: Assigned owners bring tent(s), stove and fuel, cook kit, cooler, water storage, lantern, trash system, first aid kit, repair kit, camp table if needed.
  • Optional lane: Items like hammock, extra chairs, games, coffee upgrades, binoculars, cast-iron pan - only if space and time allow.
  • Owner rule: Each communal item has one owner and one backup contact who knows its storage location.
  • Duplication rule: Only duplicate mission-critical items like fire starters, water treatment, navigation gear. Avoid duplicating bulky comfort items by default.
  • Loading rule: Store communal gear in one or two labeled bins per vehicle (e.g., Kitchen Bin, Shelter Bin).
“Optional gear is only optional if it does not displace the essentials.”
— Car-loading reality check

Use Communal Quantities Instead of Brand Lists

Write “2 pots (1 medium, 1 small)” and “1 cutting board” instead of listing every utensil. This keeps lists reusable across trips and kitchens.

Track Readiness at a Glance: Packing Progress, Last-Minute Adds, and Reminders

A dashboard works best when it shows what is done, missing, or at risk without scrolling through many lines.

Make readiness visible so you can quickly see if you are packed enough to leave, what is unassigned, what must be purchased last minute, and what depends on the forecast.

CampMate’s checkoff system and category progress bars help avoid last-minute chaos.

  • Create three status tags for items: Packed (in vehicle or staging area), Staged (pulled and ready to load), To Buy (not owned or needs replenishing like ice, propane, batteries).
  • Keep a Last-Minute Adds micro-list with 5 - 10 essentials: phone charger, sunglasses, hat, park pass, cash for firewood, shower quarters, bug spray.
  • Set reminders tied to the itinerary such as: 'Fill water jugs at last stop,' 'Pick up permit at 2:00 pm,' 'Charge battery bank night before.'
  • Do a 5-minute pre-departure scan of keys, wallet, reservation screenshot, headlamp, water, and a snack.
“Progress is not a feeling. It is checkmarks on the things that matter.”
— Dashboard-first planning

Add Weather Modules Without Rewriting Your List

Add small add-on modules based on forecast (Cold Night, Rain, Heat, Wind). Keep them separate so your core list stays reusable.

FAQ: Camping Trip Planner Checklist Questions

Answers to common questions about group planning and low-signal campgrounds using a consistent dashboard format.

These questions often come up when using a structured checklist for every trip.

  • How do I use this camping trip planner checklist for group trips? Start with the trip card roster, assign every communal item an owner and a backup contact, keep personal gear unassigned, and separate optional items so essentials stay clear.
  • Do I need a template or build a new plan every time? Use a template structure with consistent fields and categories, then customize quantities based on attendees and nights. Reuse the structure, not exact items.
  • What if there is no cell service at the campground? Save reservation details and arrival instructions inside your trip dashboard, take screenshots of confirmation and gate codes, download offline maps, and note the last reliable fuel stop.
  • How detailed should the itinerary be? Keep it to key anchors like arrival time, main activity window, dinner, and checkout. Include timed permits or shuttle windows if needed, but avoid over-scheduling.
  • How do I avoid overpacking while tracking everything? Use quantities and clearly label optional items. Keep comfort gear in the optional lane so tradeoffs are visible, not hidden.
“Every repeated question is a missing checkbox.”
— Template-building logic

Add Fields When FAQs Reveal Gaps

When the group asks the same question more than once (e.g., gate code, quiet hours, water source), add a dedicated line for it in your campsite details section for next time.

Conclusion: Save the Plan, Reuse It, and Start Your Next Trip Faster

A calm trip comes from a calm dashboard with clear details, simple anchors, and visible packing progress.

Keeping dates, destination, campsite rules, and packing progress in one place means you rely less on memory and scattered messages. The checklist structure here is designed to be reused with consistent fields, categories, and assignment lanes each trip.

After your trip, spend two minutes noting unused items, wished-for gear, and campsite quirks like late check-in or shower tokens. This turns your dashboard into an evolving template.

CampMate is designed for storing trip cards, campsite details, and checkoff-based packing workflows in one place. Create your trip, add the fields above, and let packing progress show when you are truly ready.

  • Keep the dashboard concise, specific, and shared.
  • Plan first (trip card, reservation, arrival), then pack (categories, quantities, owners).
  • Reuse the structure, refine modules, and start future trips half-finished the best way.
“A reusable checklist is the best piece of gear you can bring.”
— Planning takeaway

Do a Post-Trip Template Upgrade

Add only 3 improvements after each trip, for example: ‘extra stakes,’ ‘more water capacity,’ ‘headlamp batteries.’ Small iterations keep your checklist sharp without bloat.

Continue the journey

Build Your Next Trip Dashboard in CampMate

Create one trip, add your campsite details, then turn the plan into a shared packing checklist with clear owners and visible progress.

Related Articles

Continue exploring camping tips and packing guides