
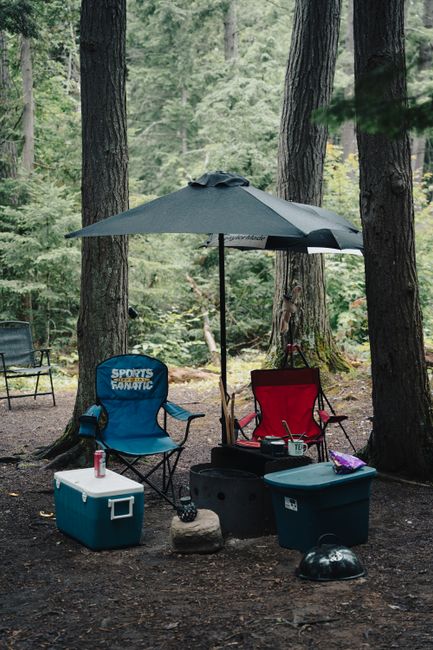
A calm, well-organized campsite with a tent zone, kitchen area, and chairs under trees near a picnic table

How to Choose a Campsite: A Calm Setup Plan for Any Group

Discover how to choose a campsite by focusing on shade, drainage, wind, privacy, and proximity, then set it up calmly with a simple layout map, a 5-minute site check, and a packing list designed for a smooth arrival.

13 min read

Arrive and Set Up Calmly with a Simple Plan

Effortless campsite setups come from following repeatable steps every trip: select the right site, confirm zones, and set up in an order that avoids rework.

A calm arrival starts before you touch a stake. When your group knows the designated tent zone, kitchen area, and which gear bin comes out first, you skip the common campsite shuffle: moving tents after pitching, relocating stoves because of wind, or searching for a headlamp as daylight fades.

This guide offers a practical plan to choose a campsite and set it up smoothly for your group. You'll find a pre-booking checklist, a 5-minute arrival walk-around, a simple layout map with zones for sleeping, cooking, hanging out, and gear storage, a 20-minute setup sequence, and a packing list tailored for a calm first hour.

  • Goal: Make one decision per zone (sleep, cook, hang, stash) before executing
  • Focus: Shade, drainage, wind protection, privacy, and kitchen flow
  • Outcome: Fewer do-overs, faster meal prep, and a campsite tailored to your trip
“Slow is smooth, smooth is fast. A five-minute plan saves an hour of rework.”
— Campground rule of thumb

The One-Sentence Plan

Before unloading, say: “Tents go on the highest, flattest ground; kitchen upwind of sleeping; hangout in shade; and one gear drop spot by the car.”

Start with Your Group and Trip Style

The best campsite depends on your group’s vehicles, experience, pets, kids, cooking habits, and how much time you want to spend managing camp.

Before booking, decide what matters most for this trip: easy parking, abundant shade, extra privacy, large tent pads, proximity to bathrooms, or a quiet loop away from traffic. Trying to optimize everything usually results in a site that’s just okay at all.

Use these quick filters to match your site to your group.

  • Car camping (1 - 4 vehicles): prioritize pull-through or wide spurs, level tent areas, and space for a kitchen table. For heavy cooking, choose sites with stable picnic tables and room for stove stands.
  • RV or trailer: check pad length, leveling needs, overhead clearance, and space for mats or chairs without blocking hookups. Opt for sites where doors open toward hangout zones, not roads.
  • Kids: pick sites with clear sightlines between hangout and tents and minimal hazards like steep drops, dense brush, or nearby roads.
  • Pets: choose sites with natural boundaries and midday shade. Review leash and quiet hour rules.
  • First-timers: prioritize convenience over views by choosing sites near water and bathrooms to reduce stress.
  • Big groups: select adjacent or group sites and assign zones per site if permitted, such as one kitchen hub and one quiet sleep area.
“The right campsite makes your group easier to manage, not just prettier in photos.”
— Camp host advice

Assign Roles Before Arrival

Appoint a site lead (layout decisions), a kitchen lead (stove, water, dishes), and a sleep lead (tents, pads, lights). This lets others help without crowding one task.

How to Choose a Campsite Before Booking: Shade, Drainage, Wind, Privacy, Proximity

Most campsite challenges can be anticipated by studying maps, photos, and asking key questions. Use this checklist to avoid common regrets.

When reserving online, look beyond the site number. Use satellite view when available, read recent reviews for wind and noise insights, and examine the tent pad and picnic table locations relative to roads.

This pre-booking checklist helps you choose a campsite that supports calm setup and comfortable downtime.

  • Shade: For warm weather, seek afternoon shade over hangout zones. Morning sun on tents is fine if you prefer early wake-ups. For cooler shoulder seasons, more sun helps dry condensation.
  • Drainage: Choose slightly elevated, gently sloped areas that shed water away from tent pads. Avoid low spots, depressions, or runoff paths.
  • Wind: Look for natural windbreaks like trees and shrubs but avoid setting up under heavy deadfall. On exposed sites, prefer sheltered loops over wide-open views.
  • Privacy and noise: End-of-spur sites or those with vegetation buffers feel calmer. Sites near bathrooms, dumpsters, playgrounds, or main roads can be noisy and brightly lit at night.
  • Proximity: Closer to parking and water is convenient when hauling gear; farther sites offer more quiet.
  • Surface and pad size: Confirm tent pad dimensions and surface type (gravel, sand, dirt, platforms). For large tents, measure your footprint at home and compare.
  • Rules and constraints: Check fire regulations, bear storage rules, generator hours, and if you can place extra shelters like tarps or screen houses.
“Pick drainage first, then shade, then everything else.”
— Rainy-weekend lesson learned

Two Questions That Save Bookings

If unclear, call and ask: (1) Where does water flow during rain on this loop? (2) Which sites get the strongest afternoon wind? Staff usually know.

Quick Site Check on Arrival: The 5-Minute Walk-Around

Before unloading gear, do a short walk to confirm the best zones for tents, kitchen, and hangout. This prevents moving gear after setup begins.

Park, take a breath, and walk the site with your site lead. Look for the highest, flattest sleep area; the safest, least windy kitchen spot; and a comfortable hangout area as the sun moves.

Focus on zones, not exact furniture placement.

  • Step 1: Identify sleep zone - highest, flattest ground with good drainage. Check for rocks, roots, and slope by standing where pads will go.
  • Step 2: Identify kitchen zone - stable surface, away from tent doors, with good airflow and low spark risk. Use the picnic table as an anchor if level and clean.
  • Step 3: Identify hangout zone - shade, breeze, and sightlines. Place chairs where you want to spend time, not just where they fit.
  • Step 4: Identify stash zone - one gear drop spot near the car. Keep bins and coolers together to avoid spreading gear into tents.
  • Step 5: Note constraints - ant hills, poison ivy/oak patches, low branches, slope near fire ring, and where headlights might shine at night.
“If you do not pick the zones, the gear pile will pick them for you.”
— Group-camping reality

Use a No-Unload Rule

No one unloads more than one small item until zones are chosen. This prevents gear piles forming in the wrong spots.

Layout That Works: Tent Placement, Kitchen Flow, Hangout Area, and Gear Drop Zone

A good layout reduces foot traffic through sleeping areas, keeps cooking efficient, and clearly defines shared gear locations.

Think of your campsite as a small one-way system. Create clear paths from car to stash, stash to kitchen, and kitchen to hangout without crossing tent doors or tripping over guy lines.

Follow this simple map and spacing guidelines to set up once and relax.

  • Sleep zone: Place tents on highest, flattest ground. Orient doors away from prevailing wind when possible. Leave clear walkways between tents and to bathrooms.
  • Kitchen zone: Form a triangle between stove, prep surface, and water/dish bin. Keep cooler at the edge, not in the middle.
  • Hangout zone: Set chairs where shade will be during your main hangout time (usually 4 - 8 pm). Plan space for a small fan or screened shelter if bugs are an issue and allowed.
  • Stash zone: Use one tarp or ground mat near the car for bins, chairs in bags, and 'later' items. Label one bin as 'shared' for easy access.
  • Fire ring: Treat as a destination, not the campsite center. Keep tents and kitchen upwind and farther away if smoke drifts.
  • Guy lines and cords: Route away from main footpaths. Use bright cord or reflective markers for night safety.
“The best camp kitchens have a home for water, trash, and dirty dishes.”
— Experienced car camper

Kitchen Flow Test

Stand at the stove and imagine cooking pasta: where does the pot drain? Where do utensils go? Where do dirty dishes land? Move items now if you need to step around the cooler repeatedly.

Set Up Calmly: The 20-Minute Sequence That Prevents Re-Doing Everything

This order prioritizes shelter, light, and organization. It works well for typical car camping arrivals, even late check-ins.

After choosing zones, set up to protect your time. The goal is not speed for its own sake but avoiding a chain reaction where missing items stall tasks.

In rain or wind, start with shelter and keeping gear dry, then add comfort features.

  • Minute 0 - 2: Put on headlamps if fading light. Lay a ground tarp or mat in stash zone. Place the 'first out' bin on the picnic table.
  • Minute 2 - 8: Pitch primary shelter (tent body and rain fly or tarp over kitchen/hangout if wet). Stake corners lightly until alignment is confirmed.
  • Minute 8 - 12: Inflate pads, unroll sleeping bags, place nighttime essentials (headlamp, water, warm layer) in tents.
  • Minute 12 - 15: Build kitchen triangle: stove and fuel, water jug, dish bin. Set up trash and recycling to prevent litter spread.
  • Minute 15 - 18: Arrange chairs and small table in hangout zone. Put bug spray and sunscreen in a visible shared spot.
  • Minute 18 - 20: Tidy quickly: consolidate empty bags, close bins, confirm food storage plan per local rules.
“Stake enough to hold, then adjust once. Over-perfecting early leads to re-staking twice.”
— Setup shortcut

Rain Module

If raining, prioritize staying dry: tarp first, then tent, then other gear under cover. Keep a microfiber towel handy for hands and zippers.

Packing List for a Smooth Arrival: First Out Bin, Setup Kit, and Shared Items

Calm setup begins in the car. Pack so the first 20 minutes require no digging. Assign shared items to avoid duplicates or missing gear.

The most effective packing change is a dedicated 'first out' bin near the trunk or tailgate. It holds essential items to unlock setup: lights, shelter tools, and small parts that easily get lost.

For groups, decide which gear is shared versus personal. Pack shared gear once, label it, and assign to specific vehicles to keep it together.

  • First out bin (1 per group): 2 headlamps plus spare batteries, 1 lantern, 2 lighters, 1 roll duct tape, multitool, small mallet, 8 - 12 extra stakes, 4 - 6 guyline tensioners, compact first aid kit, microfiber towel, 10 - 20 feet paracord, trash bag roll, wet wipes.
  • Setup kit (1 per campsite): tent footprint, repair sleeve/patch kit, spare cord, mini brush and dustpan, small tarp (6x8 ft or larger), 4 spring clamps, 2 carabiners.
  • Kitchen core (1 per group, for 2 - 4 people): 2-burner stove, 2 fuel canisters or 1 propane cylinder, lighter, windscreen if allowed, 1 pot (2 - 3 L), 1 pan, cutting board, sharp knife with sheath, stirring utensil, spatula, tongs, 4 bowls, 4 mugs, 4 sporks, wash basin, rinse basin or collapsible bucket, biodegradable soap, scrubber, quick-dry towel.
  • Water (typical car camping): 1 - 2 gallons per person per day plus 1 extra gallon per group for dishes if not near a spigot. Use a hard-sided jug with spigot for kitchen.
  • Food storage (follow rules): cooler sized for meals, dry food bin with latch, odor-resistant snack bag for day hikes, 2 - 4 spare zip bags for leftovers and trash.
  • Comfort and site tools: small broom, doormat, tablecloth or clip-on cover, clothespins, paper towels, handwashing station (soap, water, towel).
  • Weather modules (optional add-ons): hot/sunny (shade tarp or canopy, extra water, electrolyte packets, sunscreen, wide-brim hat, small battery fan); cool nights (extra insulating layer, beanie, thicker socks, hot drink kit); windy (extra stakes, longer guylines, low-profile shelter, stove windscreen); wet (extra tarp, boot tray or ground mat, 2 extra quick-dry towels, rain jackets accessible).
“When the first bin out is always the same, setup becomes muscle memory.”
— Repeat-trip strategy

Group Packing That Works

In CampMate, build a shared packing list with owners: assign one person 'kitchen core,' another 'water,' another 'shelter tools.' Specify quantities to avoid six lighters and no soap.

FAQ: Choosing a Campsite and Setting Up Efficiently

Quick answers to common questions about campsite selection and setup.

When you’re tired or arriving late, small decisions can feel overwhelming. These answers help you keep moving without overthinking.

  • Question: How do I choose a campsite if I cannot see photos of the specific site? Answer: Choose the loop first. Look for notes on wind exposure, drainage, and noise, then select a site away from bathrooms and roads if quiet matters or closer for convenience.
  • Question: Is it better to camp under trees for shade? Answer: Shade improves comfort but avoid pitching directly under heavy deadfall or unstable branches. Aim for partial canopy near your sleeping area when possible.
  • Question: Where should the kitchen go relative to tents? Answer: Place the kitchen downwind of tents with a clear path to table and water. Keep stove and dishwater away from tent doors and main walkways.
  • Question: What is the fastest way to set up with a group without crowding? Answer: Assign three leads (site, sleep, kitchen), enforce a single gear pile, and follow the 20-minute setup sequence. Others can gather firewood, fill water, or set chairs.
  • Question: How do I avoid moving the tent after staking? Answer: Do the 5-minute walk-around first, lay the footprint, stand on corners to confirm flatness and drainage. Stake lightly, then tension once after pitching the rain fly.
“A good night is a successful setup. A perfect setup can wait until tomorrow.”
— After-dark camping mantra

Late Arrival Shortcut

If arriving near dark, set up only the tent, sleeping gear, headlamps, and a simple snack. Save full kitchen and hangout setup for morning light.

A Campsite That Fits Your Trip Makes Everything Easier

When your campsite matches your group and you follow a consistent setup order, you spend less time managing gear and more time enjoying camp.

Choosing the right campsite focuses on comfort basics: shade when needed, drainage to avoid surprises, and wind protection for pleasant cooking and sleeping. Calm setup follows a simple routine: pick zones, unload the right bin first, build shelter, and create kitchen flow.

Camping with friends or family? Coordinate shared gear, pack it once, and keep a consistent 'first out' bin. CampMate helps save your setup list as a reusable template, assign owners, and toggle weather modules so every trip starts organized before you enter the campground.

  • Choose for drainage and wind first, then optimize shade and privacy
  • Do the 5-minute walk-around before unloading
  • Use four zones: sleep, cook, hang, stash
  • Follow the same 20-minute setup sequence every trip
“The calmest campsites are built from the same simple plan every time.”
— CampMate planning philosophy

Make It Repeatable

After your trip, update your packing list with what you actually used in the first hour. That becomes your next trip’s 'first out' bin checklist.

Continue the journey

Plan a Calm Arrival with a Shared Setup List

Build a reusable campsite setup checklist, assign shared items to specific people, and toggle weather modules so your group arrives organized and sets up once.

Related Articles

Continue exploring camping tips and packing guides