
Organized camping gear layout with labeled bins, stove, water jugs, and tent stakes on a picnic table

Shared Camping Packing List Workflow for Groups: Assign Owners, Track Status, and Pack Efficiently

Master a repeatable shared camping packing list workflow that keeps groups coordinated. Build the list by zones, assign one owner per item, use clear status labels, and run a day-before check to ensure nothing is forgotten or duplicated.

11 min read

Why Group Packing Gets Messy and How a Shared Workflow Solves It

Group camping trips often falter on small details like duplicate gear, missing essentials, and last-minute store runs. A shared packing workflow transforms packing into a clear, coordinated project with defined ownership and transparent progress.

Camping with friends is enjoyable because responsibilities are shared, but packing often becomes chaotic with mixed messages: multiple people bring the same item while others are forgotten. The solution is not just a bigger checklist but a shared camping packing list workflow that clearly assigns responsibility and tracks progress.

This guide presents a tested process you can reuse for every trip. You will define what “shared” means for your group, organize the list by zones, assign a single owner per item, determine quantities using simple group math, and track status from not started to loaded. Tools like CampMate support this workflow naturally, but any shared list tool will work.

  • Goal: Everyone can answer three questions at any time: Who brings it? How many do we need? Is it packed and loaded?
  • Core rule: One owner per item, a single source of truth, and status labels that reflect actual packing stages.
  • Outcome: Fewer duplicates, fewer missing essentials, and a more relaxed departure day.
“A shared list is only useful when it answers: who owns it, how many we need, and whether it is already in the car.”
— CampMate packing rule of thumb

Start With the Workflow, Not the Gear

Agree on zones, owners, quantities, and statuses before listing items. Without this, gear debates can slow down planning.

Set Ground Rules: Define Trip Style, Headcount, and What “Shared” Means

Before adding items, clarify the trip style and decide which categories are communal versus personal. This prevents assumptions and overpacking.

Start with a 10-minute alignment session to set boundaries so the list stays focused and assignments make sense. This is about trip context, not brand choices.

Decide on trip style and constraints: car camping or walk-in, cooking complexity, power availability, and campsite rules like fire restrictions. Confirm headcount, nights, and vehicle numbers, as these affect quantities and packing.

Clarify what “shared” means in your group. Most succeed by sharing communal infrastructure while keeping personal comfort gear separate. This keeps the shared list concise and coordination manageable.

  • Record trip basics: dates, nights, campsite address, check-in time, vehicle count, drive time, and nearest store location.
  • Define shared categories: kitchen, water, shelter, lighting, tools, first aid, trash and cleanup.
  • Define personal categories: clothing, sleep system components, toiletries, medications, and personal snacks.
  • Decide early whether meals are planned centrally or individually, as this impacts food packing.
“If nobody would notice it missing until bedtime, it is probably personal gear.”
— Group packing heuristic

Use a “Shared by Default” Filter Sparingly

Avoid turning the shared list into a catch-all. Limit it to items whose absence affects everyone.

Organize the Shared List by Zones: Kitchen, Shelter, Sleep, Comfort, and Fun

Dividing the packing list into zones keeps it organized and simplifies assigning and loading gear. Each zone contains a minimum viable kit plus optional add-ons.

Rather than a long, unwieldy checklist, structure your shared list by zones that correspond to actual packing containers like bins or bags. This approach makes ownership clearer and car loading easier.

Below is a practical zone template for a typical two-night car camping trip for four people. Adjust quantities as needed using the group math guidelines in the next section.

  • Kitchen zone (minimum): 2-burner stove (1), fuel (2 x 16 oz propane canisters or equivalent), lighters (2), windscreen (1), cooking pots and pans, cutting board, chef’s knife, stirring spoon, tongs, can opener, dish bin with biodegradable soap and sponges, quick-dry towels, trash bags, paper towels, aluminum foil.
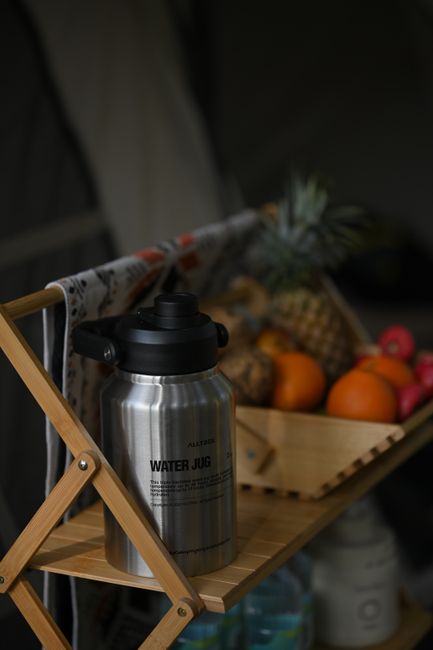
  • Water and drinks zone: Water jugs totaling 2 gallons per person per day, dispenser, backup purification methods, coffee kit, shared mugs if preferred.
  • Shelter zone: Tents with rainfly, footprint or groundsheet, stakes plus extras, guylines, mallet, tarp, tarp cord or ridgeline, clothespins or tarp clips.
  • Sleep support zone (shared items only): Repair tape, patch kit for pads, pump or pump sack, optional shared earplugs.
  • Comfort zone: Camp chairs (usually one per person unless personal), shade canopy if allowed, lanterns, spare batteries, bug repellent and citronella candles if used.
  • Tools and safety zone: First aid kit, multitool, duct tape, cordage, work gloves, fire-starting kit, small broom and dustpan if desired, maps or offline navigation devices with backup.
  • Fun and extras zone: Compact games, speaker, hammock, binoculars, stargazing apps downloaded in advance.
“Zones turn packing into grabbing containers, not remembering individual items.”
— Camp organization principle

Name Zones Like Your Bins

Label zones with the same names as packing containers to speed packing and avoid misplaced gear.

Assign Owners Clearly: One Person per Item Plus a Backup Plan

Clear ownership prevents missed or duplicated gear. Having a backup verifier for critical items avoids single points of failure without doubling equipment.

Shared responsibility often leads to confusion. Assign one owner per item to prevent duplicates and gaps.

Assign ownership at the right scale: entire kits like the Kitchen Bin or Water Kit when possible, or individual items for critical gear that may travel in different vehicles.

Add a backup plan by naming a verifier who confirms packing status and can provide substitutes if needed, without packing duplicate gear.

  • Owner rule: Assign one named person per item or kit; avoid vague assignments like “someone” or “we.”
  • Backup rule: For critical items, add a verifier responsible for checking status before departure.
  • Bundle rule: Assign the entire bundle of related accessories to one owner to maintain coherence.
  • Car rule: For multiple vehicles, assign critical gear to specific vehicles to avoid confusion.
“One owner packs it. One verifier trusts but checks it.”
— Group workflow standard

Use a “Critical Gear” Tag

Tag items like shelter, water, stove, lighting, and first aid as critical to ensure they have both an owner and a verifier.

Add Quantities Using Simple Group Math to Avoid Overpacking or Shortages

Specifying quantities is essential to balance packing space and preparedness. Use straightforward formulas and write numbers directly in the list.

Many shared lists name items but omit quantities, making packing unclear. Quantities should be added for consumables, items linked to headcount, and those dependent on trip length.

The following conservative calculations suit typical car camping scenarios and can be adjusted for weather and cooking complexity.

  • Water: 2 gallons per person per day as a baseline; increase to 2.5-3 gallons for hot weather or frequent dishwashing.
  • Stove fuel: One 16 oz propane canister per two people per day; add one extra canister for longer cooking or cold, windy conditions.
  • Ice and cooler capacity: One medium cooler (45-65 qt) per 2-3 people for two nights, or one large cooler (70+ qt) for four people; ice amounts vary by heat and cooler access.
  • Trash bags: One bag per day plus two extras for wet gear or recycling; typically 5-6 bags for a two-night trip.
  • Paper towels: One roll per four people per weekend, plus one extra for greasy meals.
  • Dish soap: One small bottle and two sponges to alternate drying and washing.
  • Lighting: One headlamp per person (personal), plus one lantern per 2-3 people for common areas.
  • Stakes and guylines: Full set per tent plus extras for tarps and unexpected needs.
“A quantity turns a suggestion into a task.”
— Packing list best practice

Track Quantities as ‘Need’ and ‘Have’

Example: “Propane canisters: need 3, have 2.” This highlights gaps early and reduces confusion.

Track Packing Status: Not Started, In Progress, Packed, and Loaded

Using clear status labels reduces uncertainty and ensures everyone is aligned on the packing process. Define what each status means to avoid confusion.

A shared list only prevents surprises if it reflects reality. Statuses should correspond to physical milestones, not intentions.

A simple system includes four statuses: Not started, In progress, Packed, and Loaded. The key difference is between Packed (ready and packed at home) and Loaded (physically in the vehicle).

  • Not started: Item has not been gathered or assigned.
  • In progress: Item is being prepared, checked, or purchased.
  • Packed: Item is fully packed in its container and ready by the door.
  • Loaded: Item is physically loaded in the assigned vehicle.
“Packed is a promise. Loaded is proof.”
— Departure-day mantra

Set ‘Ready By’ Deadlines for Critical Gear

For example, “Shelter Bag ready by 6 pm the night before” ensures critical items are packed early.

Day-Before Checklist: Final Confirmations, Load Plan, and Substitutions

The day before departure is crucial for turning a good packing list into an on-time departure. Confirm critical gear, finalize the load plan, and arrange substitutions if needed.

Hold a brief 15-minute check-in focusing on critical gear, quantities, and loading plans. If using CampMate, update statuses and leave notes for any in-progress items.

Create a load plan that keeps setup-critical items accessible and secures heavy gear low and stable. Confirm substitutions early to avoid last-minute scrambling.

  • Confirm critical gear is packed: tents, stakes, stove and fuel, water, first aid kit, lanterns, trash bags.
  • Check power sources: headlamps and lanterns charged, with spare batteries stored in labeled pouches.
  • Prepare weather-related add-ons based on the forecast: rain tarps, warm layers, extra water, stakes for wind.
  • Load plan tips: Shelter and lighting near trunk opening, kitchen and cooler accessible, water jugs secured, firewood separated, and an “arrival kit” bag with essentials.
  • Arrange substitutions: If the primary stove is unavailable, use a single burner with a larger pot; if lanterns are missing, add extra headlamps; if cooler space is limited, reduce perishables and increase shelf-stable food.
“The day-before check-in is where you buy time back on departure morning.”
— Group trip planning note

Create a Consistent ‘Arrival Kit’

Pack a small tote with headlamp, lighter, tape, stakes, hand sanitizer, and campsite info. Assign the same owner each trip for reliability.

FAQ: Common Questions About Shared Camping Packing Lists

Addressing frequent questions with clear rules helps avoid friction and streamlines group packing.

These common questions arise on almost every group trip. Resolving them upfront and embedding answers in your workflow makes packing simpler every time.

  • Question: Should assignments be by person or by car? Answer: Assign ownership by person, then note vehicle destinations for critical gear to ensure clarity.
  • Question: How do we avoid duplicates without missing essentials? Answer: Assign one owner per item and add a verifier for critical gear who confirms packing status without duplicating equipment.
  • Question: What belongs on the shared list versus personal lists? Answer: Include true group dependencies like shelter, cooking gear, water, lighting, and cleanup on the shared list. Keep clothing and sleep systems personal unless explicitly shared.
  • Question: What if the tent owner arrives late? Answer: Assign the tent to an early-arrival vehicle or provide a secondary shelter option like a tarp for early setup.
  • Question: How to handle group food? Answer: Choose either a shared meal plan with assigned meals or fully personal food. Avoid mixed models unless meals are clearly labeled as communal.
“If it is not written down, it is not a rule; it is a hope.”
— Group coordination truth

Write Your Rules at the Top of the List

A brief “How we pack” note keeps new members aligned. Pin it in tools like CampMate for visibility.

A Repeatable System to Simplify Every Trip

The goal of a shared workflow is to reduce effort over time. Save your zones, rules, and status labels, and reuse them with small adjustments for each trip.

A successful shared camping packing list workflow focuses less on perfect gear and more on consistently applying a simple process: set ground rules, build by zones, assign one owner per item, calculate quantities, and track statuses through loading.

Once agreed upon, reuse the workflow. Keep a base template and adjust as needed for weather and campsite specifics. CampMate’s shared lists and status tracking make coordination seamless, but the key is the repeatable system you create.

For your next trip, duplicate your previous list, update headcount and nights, run a day-before check-in, and depart confidently knowing essentials are covered.

  • Reuse zones and kits like Kitchen Bin, Water Kit, Shelter Bag, and Tools and Safety.
  • Incorporate what worked into your template and remove unused items.
  • Keep the list concise, specific, and clearly owned.
“The best packing list is the one you improve a little after every trip.”
— CampMate approach to repeatable planning

Perform a 3-Minute Post-Trip Review

After unpacking, note what ran out, what was duplicated, and what was missing. Update your template promptly to improve the next trip.

Continue the journey

Coordinate Group Packing Without Chat Chaos

Create a shared trip list, assign owners, set quantities, and track packing status from not started to loaded, keeping the whole crew aligned.

Related Articles

Continue exploring camping tips and packing guides