
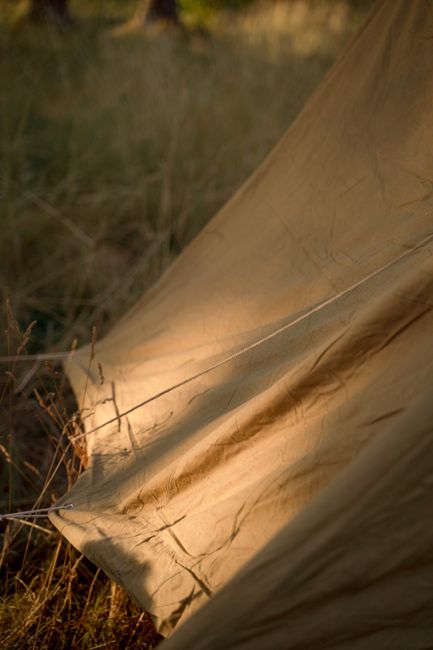
Rainfly-covered tent with extra guylines and a tarp vestibule under cloudy skies with packed dry bags nearby

Weather Camping Packing List: Essential Layers, Rain Gear, and Shelter for Any Forecast

Master a weather camping packing list that adapts quickly to changing forecasts. Learn temperature-based layering, rain and wind gear essentials, and how to protect your sleep system efficiently.

11 min read

Pack Once, Adjust Quickly When the Weather Changes

Avoid rebuilding your entire packing list with every forecast update. Use simple swap rules to add, upgrade, or remove gear based on key weather triggers.

Unpredictable weather is the norm when camping. The key is how fast you can translate a forecast shift - like ‘possible rain’ or ‘cool nights’ - into the right clothing layers, shelter adjustments, and dry-storage decisions without overpacking.

This guide offers a forecast-driven adjustment system instead of a full checklist. It uses temperature bands for clothing and sleeping gear, plus rain and wind triggers that guide when to pack rain pants, extra stakes, tarps, or additional dry bags.

If you already have a core gear setup, these steps take less than 10 minutes. For group trips, this system helps assign weather upgrades to prevent duplicates and lighten everyone's load.

  • Goal: Gear matches the forecast, not your packing anxiety
  • Method: Combine temperature bands with rain, wind, and condensation triggers
  • Outcome: Stay drier, warmer, and avoid carrying excess gear like multiple tarps
“Pack for the night low and the rain window. The rest is just comfort tuning.”
— CampMate field note

The 10-Minute Weather Check

Before packing, note four key forecast numbers: overnight low, daytime high, peak wind gusts, and rain timing (start and stop). These guide nearly every packing decision.

Step 1: Interpret the Forecast Like a Camper

Standard weather apps focus on cities. Campers need detailed timing, terrain effects, and overnight conditions.

Start with the hourly forecast instead of daily icons. For example, ‘40% chance of rain’ is vague, but ‘rain from 3 pm to 7 pm’ clearly shows when you need rain gear and shelter protection for cooking or downtime.

Check wind speeds and gusts. Wind can turn a mild forecast into a noisy, uncomfortable night. Gusts affect tent stakes and guyline needs more than steady wind speeds.

Pay attention to overnight lows and humidity. Dry 40°F nights feel different from damp 40°F nights, which can increase condensation inside your shelter.

  • Rain timing: start and stop times, scattered vs steady rain
  • Wind: sustained and gust speeds, overnight peaks
  • Overnight low: pack sleep layers for the coldest temperature, not daytime highs
  • Humidity and dew point: higher values increase condensation risk
  • Terrain effects: exposed ridges feel windier; valleys trap cold air overnight
“A sunny icon can still mean a wet tent if the dew point is high and you camp in a low spot.”
— Backcountry ranger advice

Translate Forecast into Simple Triggers

Write if-then rules like: ‘If gusts exceed 25 mph, add 4 extra stakes and 2 guylines.’ This prevents overpacking during mild conditions.

Step 2: Use Temperature Bands for Layering and Sleep Systems

Temperature bands let you swap one or two items instead of repacking everything when conditions change.

Base your bands on the overnight low. Daytime hiking outfits can adjust more flexibly, but your sleep system and evening layers must fit the coldest temperatures you’ll face.

Below is a practical band system for most three-season camping. Adjust based on personal cold tolerance and exposure to wind, such as camping on exposed ridges or beaches.

  • Band A (overnight low 55°F / 13°C and up): 1 base top, 1 hiking shirt, optional light fleece, light sleep layer
  • Band B (45 to 54°F / 7 to 12°C): base top plus midlayer (fleece or light puffy), beanie, sleep socks
  • Band C (35 to 44°F / 2 to 6°C): warmer midlayer (puffy or heavy fleece), gloves, warmer sleep layer, consider insulated sleeping pad upgrade
  • Band D (34°F / 1°C and below): add dedicated warm camp layer, thicker socks, neck gaiter, confirm sleeping bag and pad ratings
“One dry set is a system, not a luxury.”
— Experienced car-camping mantra

Avoid Damp Clothes with Smart Quantities

For 2 to 3 nights, pack two base layers (one to wear, one dry for sleeping), two hiking sock pairs plus one sleep pair, and one warm layer kept dry during chores.

Step 3: Pack Rain Gear Based on Intensity and Duration

Effective rain gear depends on forecast details and easy access when rain starts.

Use shells you already have, adding only what the forecast requires. Avoid bringing heavy rain gear for light sprinkles or just a jacket when long wet conditions are expected.

Plan dry storage carefully. A great rain jacket won’t help if your sleeping bag or fresh layers get damp in your pack or car.

  • Always carry (any chance of rain): waterproof jacket with hood, pack cover or liner, and 2 to 4 heavy-duty trash bags for backup waterproofing
  • Add rain pants when rain lasts 2+ hours, temperatures drop below 55°F / 13°C, wet vegetation is expected, or standing around camp in drizzle
  • Add waterproof mitts or shells when temps are below 45°F / 7°C with rain likely to keep hands warm during chores
  • Dry storage baseline: two dry bags (10 - 20L) per person for sleep clothes and electronics, plus one shared dry tote for group gear if car camping
  • Keep rain jacket and headlamp in a top pocket for quick access
“Rain gear is only half the plan. The other half is keeping your warm layers untouched until you need them.”
— CampMate packing principle

Separate Wet and Dry Zones

Assign one bag as the wet zone for rain gear, wet shoes, and tarp. Keep a separate dry zone for sleep layers and insulation to prevent moisture transfer.

Step 4: Upgrade for Wind - Stakes, Guylines, and Campsite Placement

Wind amplifies gear needs. Small upgrades increase shelter stability, reduce noise, and improve comfort.

When gusts are forecasted, treat your shelter as a system including stakes, guylines, and site choice. Most tents come with minimal stakes and short guylines, which work fine in calm weather but can cause problems in wind.

A small tarp can also boost comfort during wind and rain without adding much weight, especially for car camping or basecamp trips.

  • Gusts 15 - 25 mph: bring 2 - 4 extra stakes, 2 additional guylines (6 - 8 ft each), and a small repair kit (duct tape wrap and spare cord)
  • Gusts over 25 mph or exposed sites: bring 6 extra stakes, longer guylines (8 - 12 ft), and sturdier stakes suited to soil type
  • Tarp setup: versatile 8x10 ft tarp, 4 - 6 stakes, 2 guylines, and poles or ridgeline cord for tree attachment
  • Campsite basics: position your tent behind natural windbreaks, avoid ridgelines and exposed points, and face the narrow end of the tent into the wind
“Wind problems are usually stake problems first.”
— Common tent-setup lesson

Stake Management for Shared Shelters

Count stakes before departure. A tent with guylines can require 10 - 14 stakes; adding a tarp can push that to 18 - 20. Assign one person to carry the stake kit to keep parts organized.

Step 5: Manage Ground Moisture and Condensation

Condensation and ground wetness are predictable. Pack a small module to protect your sleep system and clothing from dampness.

Condensation is a natural result of humid air, cool nights, and breathing inside a shelter. The goal is to manage it so moisture does not soak your gear or ruin your morning.

Ground moisture can find weak points in your setup, especially at tent edges and entryways.

  • Use a footprint or groundsheet when ground is wet, rain is expected, or camping on abrasive surfaces. Size it to fit under the tent floor without extending beyond edges.
  • Ventilation upgrades: bring 4 clothespins or small clips to create airflow hacks and keep vents open unless wind-driven rain enters.
  • Quick-dry kit: pack a small towel, microfiber cloth for wiping tent walls, and a 15 - 25 ft line or cord for drying gear under a tarp.
  • Entry management: keep a small doormat or foam pad at the door to reduce mud and grit inside.
  • Sleep protection: store your sleeping bag and sleep clothes in a dedicated dry bag until bedtime.
“Ventilation is lighter than fighting dampness with extra clothes.”
— Ultralight-friendly truth

Morning Tent Wipe-Down

Before packing, spend 60 seconds wiping condensation from inside the fly and walls with a microfiber cloth. This reduces moisture carried home.

Step 6: Adjust Packing by Trip Style

Apply the same weather rules but change how you distribute weight, duplicates, and comfort items based on your trip type.

Separate must-have protection gear from nice-to-have comfort items. Trip style determines which comforts are worth carrying and how many backups to bring.

Group packing benefits from shared weather gear like one tarp and one drying line instead of everyone carrying partial setups.

  • Car camping: carry the tarp module more often, add a large dry tote for group gear, and pack an extra pair of shoes (camp shoes plus dry backup if rain is steady).
  • Backpacking: prioritize a pack liner over an external cover, limit clothing to one hiking and one sleep set, and choose lighter rain pants or skirts based on terrain and temperature.
  • RV day trips: keep a weather grab bag by the door with rain jackets, beanies, gloves, and headlamps to avoid forgetting layers when leaving.
  • Group roles: assign one person to stakes and guylines, another to tarp and cordage, and another to dry-storage extras like spare bags and clips.
“The best group packing is one full system, not everyone bringing half a system.”
— Camp group lesson learned

Prevent Duplicate Weather Gear

Use CampMate to create a shared list and assign ownership of weather modules like tarps, stakes, and drying lines. This ensures one complete setup instead of multiple incomplete ones.

FAQ: Quick Answers to Weather Packing Questions

Use these answers to resolve common uncertainties when deciding whether to bring extra gear.

These responses help break tie decisions about layers and weather upgrades.

  • What does ‘30% chance of rain’ mean for packing? It means rain is possible but not certain. Pack a rain jacket and waterproof storage as a baseline. Add rain pants or a tarp only if the hourly forecast shows a long rain window, cooler temperatures, or expected wet terrain.
  • Should I pack for the ‘feels like’ temperature? Use the overnight low for sleep layer decisions. Use ‘feels like’ to determine if wind protection like shells, gloves, or beanies are needed because wind can make conditions feel colder.
  • How many extra socks are useful? For 2 to 3 nights, bring two hiking sock pairs plus one sleep pair per person. Add an extra hiking pair if rain is steady or stream crossings are expected. Dry socks help morale and prevent blisters.
  • Do I need an extra tarp? Bring a tarp when rain overlaps cooking or hangout times, when shelter options are limited, or in group camping. Skip it on short backpacking trips unless covered rest spots are necessary.
  • What is the simplest drying strategy in wet weather? Create a covered drying zone with a tarp overhead, a line underneath, and a small towel for wiping. Keep your dry zone sealed and accept some outer layers will remain damp until home.
“A dry sleeping bag fixes a lot of imperfect forecasts.”
— Practical campsite wisdom

If You Remember One Rule

Protect your sleep system first by storing your sleeping bag and clothes in a dry bag. Everything else is negotiable.

Save Forecast-Based Packing Presets in CampMate for Easy Reuse

Once you develop your temperature bands and weather triggers, convert them into reusable packing presets to adjust quickly for every trip.

The easiest way to handle unpredictable weather is to maintain a stable core kit and add forecast modules like temperature swaps, rain upgrades, wind kits, and condensation controls as needed.

CampMate lets you save these as templates with clear labels such as ‘Band B + Rain Window’ or ‘Gusty + Condensation Kit.’ When forecasts change, simply toggle the relevant presets and assign gear to group members.

Pack once, adjust quickly, and spend more time outdoors instead of staring at weather apps.

  • Build a default core list and add modules only when triggers apply
  • Pack for the overnight low and rain timing, not just the daily icon
  • Assign shared weather modules to avoid duplicates and gaps in group gear
“A good packing list is a decision tool, not a spreadsheet.”
— CampMate approach

Choose Preset Names That Are Clear at a Glance

Use straightforward labels like ‘Low 40s,’ ‘Steady Rain,’ ‘Gusty,’ ‘Humid Nights,’ and ‘Mud Expected.’ If you can read it and pack from it quickly, it’s a good preset.

Continue the journey

Build Forecast-Based Packing Presets You Can Reuse

Create a core packing list in CampMate and save weather modules like temperature bands, rain gear, wind kits, and condensation controls as presets to toggle for each trip and assign to your group.

Related Articles

Continue exploring camping tips and packing guides