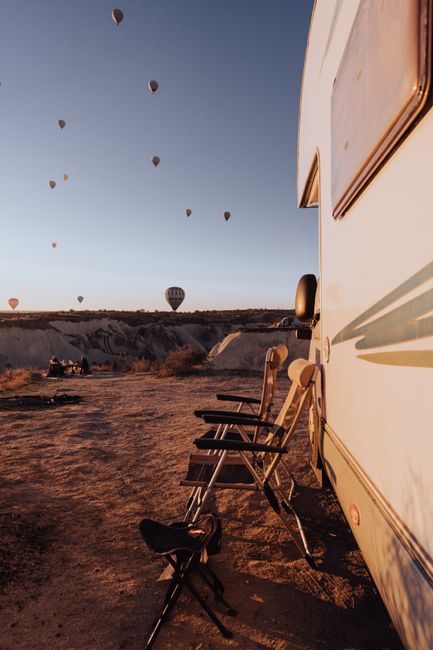
Organized RV campsite with folding chairs, a clear walkway, a picnic table, and a shoe tray beside the steps

RV Campsite Organization: A Practical Setup Guide

Build a tidy outdoor RV living space with clear walking routes, practical storage, layouts for different site sizes, and a five-minute evening reset.

11 min read

Beyond the Shopping List: Organize Around Your Routine

A shopping-focused headline offers a useful starting point, but the best setup begins with how you use your campsite.

An Islands article titled “12 Target Items You Need To Perfectly Organize Your RV Campsite” frames campsite organization around useful purchases. Before adding another bin to your RV, though, answer a simpler question: Where will your shoes, breakfast supplies, chairs, and wet towels actually go?

That is the practical takeaway behind the shopping list. Good RV campsite organization makes everyday tasks easier: stepping outside without navigating a shoe pile, preparing lunch without clearing the entire table, and packing away loose gear before rain arrives. The goal is not a showroom patio. It is an outdoor living area that works without constant rearranging.

Start with the space you are permitted to use, create a few clear zones, and give frequently handled items an obvious home. Existing tubs, dishpans, and reusable bags can often do the job. This guide covers what to check before unloading, how much storage to start with, and how to keep the setup manageable throughout your stay.

    1. Check Your Site Footprint Before Unloading

    Walk the campsite after parking and connecting the RV, but before setting out furniture.

    Look at the space remaining around deployed slides, steps, storage doors, utility connections, and the picnic table. Notice low spots where rainwater could collect and distinguish usable gravel or pavement from vegetation. Keep your setup inside the assigned site, not in a neighboring buffer or shared walkway.

    Check campground rules for ground mats, outdoor storage, clotheslines, stakes, and attachments. A mat permitted on gravel may not be allowed on grass. Booking a campsite does not automatically mean you can hang items from trees or attach hooks to campground structures.

    Identify the routes you need to keep clear. Leave the RV doorway, emergency exits, utility connections, and storage compartments accessible. Keep living-area supplies separate from sewer equipment, and avoid routing foot traffic across hoses or cables.

    • Walk from the RV steps to the picnic table, cooking area, and vehicle. Adjust anything that makes you sidestep, duck, or squeeze through.
    • As a practical starting point, allow a main walking lane about 3 feet wide, with more room for mobility needs or bulky items. This is a layout guide, not a substitute for applicable accessibility requirements.
    • Pull a chair back from the table to check that it will not block the steps or extend beyond your site.
    • Keep furniture and storage clear of the designated fire area, following campground rules and any current restrictions.

    Unpack in stages

    Set out the entry tray and one chair first. Walk your main route again, then add only the furniture and storage you expect to use during this stay.

    2. Give Cooking, Dining, and Lounging Their Own Places

    A zone is an assigned location, not a reason to buy another table.

    On a compact site, the picnic table can handle both meal preparation and dining. The trick is keeping prep supplies together in one caddy so the surface clears in a single trip.

    Keep the entry zone small: a shoe tray beside the steps and a designated indoor spot for keys and electronics. The doorway should remain a passage, not become the campsite's catch-all shelf.

    Choose a stable, permitted cooking location and follow the appliance manufacturer's clearances from the RV, vegetation, fabric, and other equipment. Do not assume an awning is a suitable cooking shelter. Keep food preparation separate from raw-food cleanup, and follow local wildlife rules whenever food is not actively being used.

    • Cooking zone: Use one prep surface, one utensil caddy, and a wash tub brought out when needed. Keep clean drinking-water equipment separate from sewer equipment.
    • Dining zone: Preserve enough table space for everyone to eat. Remove the prep caddy before serving rather than fitting plates around it.
    • Lounge zone: Start with one chair per person who will sit outside together. Keep chairs outside the main walking lane.
    • Everyday essentials: Give games and other non-food supplies one labeled container near where they are used, without blocking a compartment door.
    • Waste zone: Use a small washable container during meal preparation, then promptly transfer waste to approved disposal or storage. Do not leave a hanging trash bag outside unattended.
    “A useful organizer gives something a home. A useful layout makes that home easy to reach.”
    — CampMate editorial guidance

    3. Choose Organizers by Task, Not by Compartment Count

    Start with a small set of containers that are easy to carry, clean, and stow.

    Before adding an organizer, decide what it will hold, where it will sit during use, and where it will go overnight. If those answers are fuzzy, another container may simply give clutter a lid.

    For a weekend with two to four campers, a useful starting point is two lidded bins, one carry caddy, and one shoe tray. Add a second tray or a personal-item pouch only if needed. Check container dimensions against your RV's storage openings, and keep loaded weights comfortable to lift.

    • Two stackable lidded bins, roughly 20 to 30 liters each: Dedicate one to clean, dry outdoor tableware and one to games or similar supplies. Keep them on a stable, level surface, with heavier contents below and stacks low. Existing labeled totes work well.
    • One handled caddy: Carry utensils, napkins, and condiments for the current meal. Return food and scented contents to approved storage afterward. A dishpan or small reusable grocery bag can substitute.
    • One shoe tray for two people, or two for a family of four: Place trays beside the steps, not at the foot of them. A shallow plastic tub or washable baking tray can serve the same purpose.
    • Two to four removable hooks, if useful: Hang lightweight, dry items only on an approved surface and within each hook's load rating. Follow campground rules and RV-manufacturer guidance. Existing interior hooks may eliminate the need for new ones.
    • One washable mesh bag: Gather dry, unscented play items near the lounge area while in use. A reusable tote also works. Stow the bag and loose contents when leaving.

    A lidded tote is not wildlife-proof

    Ordinary bins organize gear; they are not approved wildlife-resistant food storage. Follow local requirements for food, coolers, trash, toiletries, and other scented items, even when everything fits neatly inside a closed container.

    4. Adapt the Layout to a Compact or Family Site

    Use these arrangements as starting points, not footprints to force onto every campsite.

    For a compact site with two adults, arrange the living area lengthwise beside the RV rather than spreading outward. Put one shoe tray beside the steps and two chairs beyond the doorway's traffic path. Use the picnic table for both preparation and meals, with a caddy that makes the switch easy.

    Keep supply bins in an accessible RV compartment between uses rather than building a permanent outdoor stack. If another table would narrow the walkway, leave it packed. A small site usually benefits more from fewer objects than from clever stacking.

    For a spacious family site with four campers, use the same entry arrangement with two shoe trays. Group four chairs in one lounge area, adding a shared small table only if space allows. Position dining and cooking areas conveniently while maintaining appliance clearances and an open route between them.

    Give outdoor play equipment one return spot instead of scattering baskets around the site. When another household visits, add seating for the gathering rather than expanding storage into neighboring space.

    • Compact-site test: Can one person carry a meal to the table while another uses the RV steps?
    • Family-site test: Can everyone put away shoes, games, and chairs without moving someone else's belongings?
    • Shared-use agreement: Show everyone where clean dishes, outdoor toys, and wet items belong on the first afternoon.
    • Group responsibility: Assign one person to close the meal station and another to check furniture and loose gear. Rotate jobs so the cook does not inherit every cleanup task.

    5. Make the Setup Easy to Change With the Weather

    Weather readiness depends on what you can stow, not just what you can cover.

    Check the forecast before arranging the outdoor living area, then reassess as conditions change. Leave enough accessible RV storage to receive the items you have put outside. A tidy patio is less helpful if packing it away requires emptying three compartments.

    Treat an awning as equipment with operating limits, not a permanent roof. Follow its manufacturer's instructions for wind, rain, and unattended use. Weights or tie-downs do not make unsuitable conditions acceptable.

    • Rain: Keep an absorbent towel and shallow wet-gear tub near the entry. Bring fabric cushions and paper supplies inside before rain. Keep bins out of low spots, and avoid placing mats where they trap or divert runoff.
    • Wind: Put away tablecloths, empty bags, folding side tables, and loose games. Close bins and stow lightweight furniture. Retract the awning as required by its instructions and conditions.
    • Heat: Move seating into existing shade without crossing site boundaries. Store heat-sensitive items appropriately indoors, and keep RV ventilation openings unobstructed.
    • Dew and damp evenings: Bring blankets and cushions inside before they become wet. Dry damp fabrics promptly rather than sealing them in a tote for the rest of the stay.

    6. Finish With a Five-Minute Evening Reset

    A short close-down routine keeps tomorrow's breakfast from beginning with yesterday's clutter.

    Reset after the last outdoor meal, rather than waiting until everyone is ready for bed. In a group of four, one pair can handle the table and food while the other handles footwear, furniture, and loose belongings.

    Five minutes is a target for tidying, not a deadline for dishwashing or proper food storage. Finish those jobs thoroughly, even when they take longer. The point is a repeatable routine, not a race.

    • Minute 1: Return food, condiments, coolers, and scented items to storage that meets local wildlife requirements.
    • Minute 2: Clear and wipe the dining surface. Return clean, dry utensils to their assigned container.
    • Minute 3: Pair shoes on their trays, collect games, and move wet items to an appropriate drying location.
    • Minute 4: Stow cushions and loose gear. Check the forecast and secure or retract the awning according to its instructions.
    • Minute 5: Walk from the RV steps to the table. Clear obstructions, check storage lids, and take waste to the approved location.

    Keep the checklist short

    Write down a few shared close-down tasks and agree on who handles each one. Use action-based reminders such as clear the table, store scented items, and stow chairs instead of creating another full gear inventory.

    RV Campsite Organization FAQ

    Quick answers about outdoor storage, wet shoes, small sites, and shared spaces.

    • Can I leave storage bins outside overnight? Only if campground rules allow it and the contents are appropriate for outdoor storage. Ordinary lidded bins are not wildlife-proof or necessarily watertight. Keep them within your site and clear of walking routes, and bring them in when weather or local rules require it.
    • Where should wet shoes go at an RV campsite? Place them on a shallow tray beside the entrance, clear of the steps. Empty collected water and move shoes to a permitted, ventilated drying spot. During continued rain, put the tray in a washable indoor area without blocking access.
    • How do I organize an RV campsite with very little outdoor space? Give the picnic table more than one job, use a movable meal caddy, and leave spare furniture packed. Store bins inside the RV between uses rather than creating a separate outdoor storage area.
    • What should I bring inside when leaving the campsite? Secure valuables, electronics, cushions, loose lightweight gear, and anything likely to get wet or blow away. Store food, trash, toiletries, and other scented items exactly as local wildlife rules require. Follow awning instructions for unattended use.
    • Should I put a mat outside the RV? Only where campground rules and the surface allow it. Choose one that fits the usable entry area without covering prohibited vegetation, blocking a route, or extending beyond your site. A small entry mat may be more practical than a large patio rug.
    • How can several campers keep the same setup tidy? Give shared items one obvious home and agree on who closes each zone. Simple labels such as dishes, games, and wet gear help. Avoid making a separate collection of shared supplies for every person.

    Start With Three Changes on Your Next Trip

    A clear path, assigned homes, and a short reset are enough to get going.

    For your next stay, keep the route from the steps to the table clear, give shoes and meal supplies specific homes, and complete a short evening reset. Test those habits before buying more storage.

    The best RV campsite organization feels almost invisible. Breakfast supplies arrive together, shoes stay out of the doorway, and chairs are easy to put away when the weather changes. Build around those routines, respect the site's limits, and let your gear match the space you actually have.

      Continue the journey

      Plan a Simpler Campsite Setup

      Plan your next RV trip with CampMate, then bring a short setup and evening-reset checklist tailored to your group.

      Related Articles

      Continue exploring camping tips and packing guides