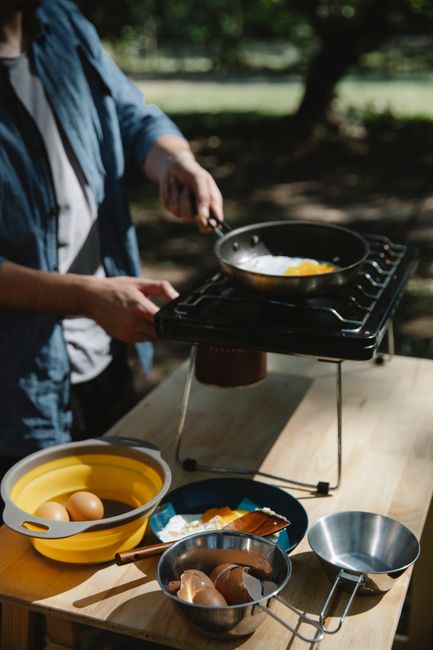
Two-burner camping stove with a pot and skillet on a picnic table beside a packed camp kitchen

How to Choose a Camping Stove for Your Meals and Budget

A stove discount is only a good deal if the kit fits your trips. Match burners, fuel, cookware, and weather performance to your menu, then compare the full cost.

12 min read

A Camping Stove Deal Is Only Useful If It Fits Your Trips

Start with the meals you want to cook, not the size of the discount.

A Mashable headline, “Amazon knocks $65 off a Coleman camping stove in this late-season deal,” offers a timely shopping lesson: a discount can get your attention, but it cannot choose your camp kitchen. The headline alone does not confirm that the offer is still available or that the stove suits your trips. Check the current listing and exact model before counting on the advertised savings.

The practical answer to how to choose a camping stove starts with three questions: What will you cook, how many people need to eat, and how far will you carry the equipment? A solo backpacker boiling water for noodles needs something different from a family cooking eggs, potatoes, and oatmeal.

This guide turns your menu into requirements for burners, cookware, fuel, and weather performance. It is a buying checklist, not a product test or endorsement of the featured deal.

    1. Start With Your Menu and Group Size

    Count the cooking tasks that need heat at the same time, rather than assigning one burner per person.

    One burner can serve several campers when meals are cooked in one pot or prepared in stages. Two burners earn their space when one dish needs to simmer while another fries, or when making hot drinks would otherwise hold up breakfast. Burner count is about cooking sequence as much as group size.

    For a solo two-night backpacking trip, imagine two instant breakfasts, two dehydrated dinners, and two hot drinks. A compact single-burner canister stove, one 0.9- to 1.2-liter pot with a lid, a spoon, and a mug may cover that menu. Count the actual water boils, since a drink prepared separately adds another heating cycle.

    For a four-person car-camping breakfast, imagine eight eggs, potatoes, and oatmeal. A two-burner stove may accommodate a 10- to 12-inch skillet alongside a 2- to 3-liter pot, but verify the fit. Cook the potatoes first, keep them covered off the stove, then cook the eggs. A simple sequence saves you from needing three pans at once.

    • One or two campers, mostly boiled meals: start with one burner and one lidded pot.
    • Three or four campers, mostly pasta, soup, or other one-pot meals: one stable burner may work if its cookware and load limits allow it.
    • Three to six campers, mixed breakfasts and dinners: two independently controlled burners are usually more convenient.
    • Larger groups: consider two separate stoves and two cooking teams rather than crowding oversized pots onto one stove.
    “Choose the stove for your busiest meal, not your easiest cup of noodles.”
    — CampMate editorial rule of thumb

    Do a breakfast rehearsal

    Write down each cooking step, including heating water and keeping food warm. If two tasks repeatedly need heat at the same time, a second burner has a clear job.

    2. Match the Stove Type and Fuel to Your Trip

    Choose a system you can carry comfortably and refuel reliably.

    For backpacking, compact canister stoves are popular for their small packed size and straightforward setup. For car camping, suitcase-style propane stoves offer a broader cooking surface. Neither is automatically better: carrying distance, meal style, weather, and fuel availability decide the fit.

    Compare the weight and bulk of the complete system, not just the burner. Include fuel, cookware, required hoses or regulators, and any approved wind protection. A tiny burner loses some of its packing advantage if your meals require several large pans.

    Fuel connections are not interchangeable. Threaded backpacking canisters, bayonet-style butane cartridges, and small propane cylinders need compatible equipment. Read the manual for approved fuels, regulators, hoses, and adapters. An adapter that physically connects is not necessarily approved.

    Before traveling, check fuel availability near your destination and transport restrictions. Camping fuel is generally prohibited in both checked and carry-on airline baggage. Confirm current airline and aviation-authority rules for the stove itself, including cleaning requirements, and plan to buy fuel after arrival.

    • Upright threaded-canister stove: compact and quick to set up. Tall pots can be less stable, and cold-weather performance depends on fuel blend, temperature, and remaining fuel.
    • Remote-canister stove: the burner sits lower, with fuel connected by a hose. Some models permit inverted-canister operation for colder conditions, but use that mode only when the manufacturer allows it.
    • Two-burner propane stove: a practical car-camping option for separate dishes. Account for packed bulk, fuel storage, and the required regulator.
    • Tabletop butane stove: convenient for mild-weather cooking where compatible cartridges are available. Follow cookware-size limits and avoid pans that overhang the cartridge compartment.
    • Liquid-fuel stove: worth considering for certain cold-weather or remote trips, depending on the model and available fuel. Expect priming, maintenance, and more setup practice.

    3. Check That Your Pots and Pans Actually Fit

    A two-burner label does not guarantee room for your skillet and pasta pot side by side.

    Measure the outside diameter of your cookware, including a skillet's flared rim. Compare those measurements with the stove's usable cooking surface, burner spacing, and manufacturer limits. Product photos may show smaller cookware than you normally use.

    A 12-inch skillet beside a wide 3-liter pot can crowd a compact stove, block a control knob, or interfere with wind guards. Handles need usable positions too. If the manufacturer does not publish enough dimensions, ask before buying.

    Check maximum pot diameter and load limits for every stove type, especially small upright burners. A large pot full of water changes the balance substantially. Use a firm, level, heat-resistant surface, and keep the cooking area away from table edges and foot traffic.

    • Measure skillet rim diameter, pot base and rim diameter, and handle clearance.
    • Verify that both vessels sit fully supported without touching fuel components or obstructing controls.
    • Check griddle compatibility. Use only an approved arrangement, since unsuitable cookware spanning burners can direct heat toward components not designed for it.
    • For shared meals, agree on one cookware set that fits the stove instead of asking everyone to bring a pan.

    Make a full-size footprint

    Sketch the cooking surface and burner centers on cardboard using the manufacturer's dimensions. Set your cold cookware on the sketch to spot obvious conflicts, then confirm fit on the actual stove before departure.

    4. Look Beyond BTUs to Control, Weather, and Fuel Use

    Useful heat reaches your pot at the level your meal needs.

    BTUs describe heat output, not cooking quality or fuel efficiency. Check whether the advertised figure is per burner or for the whole stove. High output can help heat a large pot, but it does not guarantee faster cooking in wind or better results with a small saucepan.

    For eggs, pancakes, and rice, look for a controllable low flame and a burner pattern suited to your pan. A concentrated flame can create a hot spot in thin cookware. Compare boil-time claims only when the water volume, starting temperature, wind, and cookware are similar.

    Plan fuel from cooking time, not simply nights away. For propane, a rough calculation uses about 21,600 BTU per pound. A 10,000-BTU burner running continuously at full output would use one pound in about 2.2 hours. Two such burners at full output would use it in about 1.1 hours. Actual consumption varies, so treat this as budgeting arithmetic, not a runtime promise.

    For the solo menu above, a fresh 230-gram threaded canister can be a conservative starting choice for many mild-weather weekend setups, not a universal requirement. Test your stove with your intended water volumes. Weigh the cool canister before and after cooking to measure fuel use. For family meals, add up burner-hours and carry a reserve rather than relying on an unknown partly used cylinder.

    • Mild weather: use lidded pots, measured cooking water, and the stove's built-in wind protection to keep fuel use more predictable.
    • Wind: choose a sheltered outdoor position that maintains required clearances. Use only manufacturer-approved wind protection. Never wrap an upright canister stove and its fuel canister in a windscreen.
    • Cold: check the stove and fuel guidance against expected temperatures. Choose an appropriate cold-weather system rather than warming a struggling cylinder with an external heat source.
    • Rain: keep a backup lighter dry and fuel connections clean. Never move cooking into a tent, vehicle, or enclosed shelter.
    • Local restrictions: check current stove and fire rules for your destination. An on/off valve does not automatically make a stove permitted everywhere.

    5. Budget for the Complete Cooking Kit

    Compare ready-to-cook setups, not bare stove prices.

    A lower shelf price can lose its appeal once you add the correct fuel connection, compatible cookware, or a suitable cooking surface. Build a short ownership budget before comparing deals. Equipment you already own adds no purchase cost, but only if it fits the new stove.

    For example, an illustrative $80 stove plus $15 of fuel, a $25 compatible pot, and a $5 backup lighter becomes a $125 setup before tax. These are planning figures, not current market prices. A higher-priced stove could cost less overall if it works with your cookware and includes its required regulator.

    A refillable propane cylinder may suit frequent car camping. Include the approved connection equipment, cylinder purchase, refilling access, transport requirements, and storage space in the comparison. Compare cost per usable amount of fuel rather than cylinder sticker price alone.

    For a shared kitchen, assign responsibility for each part before departure. A stove without its regulator or compatible fuel is mostly picnic-table decoration.

    • Stove owner: packs the stove, required regulator or hose, and instructions.
    • Fuel owner: brings the calculated supply plus reserve and confirms the exact connection type.
    • Cookware owner: packs the agreed pot and skillet, suitable lids, a spatula, a stirring spoon, and appropriate pot grips.
    • Kitchen lead: checks for backup ignition, a suitable cooking location, and one no-cook meal for the group.
    • Before leaving: assemble the system outdoors, check connections as directed by the manual, and confirm burner operation. Never check for leaks with a flame.

    Keep the shared kit together

    Use your CampMate trip packing list to keep the stove, compatible fuel, required connections, and matched cookware together. Agree within the group who will bring each item, especially the fuel.

    6. Check the Deal Before You Buy

    Let an advertised discount prompt a comparison, not replace one.

    The Coleman savings headline is a starting point, not proof that a particular listing is the best value today. Similar-looking stoves can differ in burner output, ignition, cooking dimensions, and included parts. Compare the full model number, not just the brand and product photo.

    Check the delivered price against other sellers offering the same model in the same condition. A crossed-out reference price is less useful than what the stove currently costs elsewhere. If the listing is unclear about an essential component, get confirmation before ordering.

    After delivery, inspect the stove and complete an outdoor setup within the return window, following the manual. Try your actual pot-and-pan combination and check low-flame adjustment. Read the return terms before adding fuel or using the stove, and keep the packaging until you know the kit suits your kitchen.

    • Model and condition: confirm the full model number and whether the stove is new, used, or refurbished.
    • Included parts: verify the regulator, any required hose, pot supports, and advertised carry case. Do not assume fuel is included.
    • Ignition: check whether it is built in, needs a battery, or requires a separate lighter.
    • Purchase protection: read seller details, warranty eligibility, return deadlines, and restrictions on returning opened or fueled equipment.
    • Final fit: confirm approved fuel, cookware limits, packed dimensions, and available storage space.

    Camping Stove Buying FAQ

    Quick answers to common questions about choosing a camping stove.

    • Can one burner handle family meals? Yes, if the menu uses one-pot dishes or sequential cooking. A suitably supported pot can handle pasta or stew while sides stay no-cook. Choose two burners when separate hot dishes need to finish together.
    • Is a more powerful camping stove always better? No. Higher output can help with large water volumes, but simmer control, cookware fit, wind performance, and fuel consumption often matter more for everyday meals.
    • How much fuel should I bring for a weekend? Estimate each burner's operating time and setting, then use manufacturer consumption figures or your own measured use. Add a reserve for weather and longer cooking. There is no reliable single-cylinder rule for every group and menu.
    • Can I use any windscreen with my stove? No. Some arrangements trap heat around the fuel container. Follow the manufacturer's instructions and use only approved wind protection.
    • Do I need built-in ignition? It is convenient, not essential. Carry a compatible backup lighter either way, and learn the correct lighting procedure before your trip.
    • Can I cook under shelter when it rains? Use the stove outdoors with the ventilation and clearances its manual requires. Do not cook inside tents, vehicles, or enclosed shelters, and do not assume an awning provides adequate clearance.
    • Should I choose a backpacking stove or a car-camping stove? Choose a backpacking system when carrying weight and packed size matter most. A larger car-camping stove usually offers more cooking room, but compare the complete kit against your menu and transport space.

    Choose for Your Cooking, Not Just the Discount

    The right stove makes your actual campsite meals easier.

    Start with your busiest meal, choose the burner count it needs, and check that your cookware fits. Match fuel and weather performance to your destination and carrying style. Then compare the full ready-to-cook price.

    A discounted stove is good value when it supports the trips you take without requiring an awkward new kitchen around it. Before departure, test the complete setup outdoors, agree who brings each shared component, and pack enough compatible fuel for your planned menu plus a reserve.

      Continue the journey

      Turn Your Menu Into a Ready-to-Pack Stove Kit

      Use CampMate to organize your camping meals and packing list, keeping the stove, matched cookware, and compatible fuel on the same trip plan.

      Related Articles

      Continue exploring camping tips and packing guides