
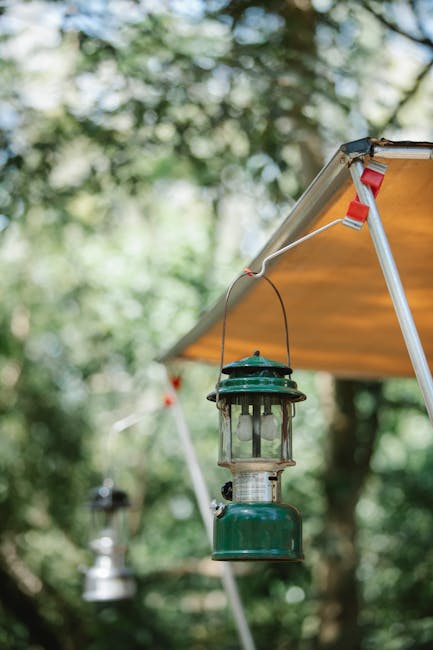
A compact camping lantern lighting a picnic table beside a tent at dusk

How to Choose Camping Lights: A Simple Campsite Setup

Choose camping lights by task, not maximum brightness. Compare lanterns and headlamps by beam, runtime, and power source, then build a simple setup for your trip.

13 min read

New Camping Light Roundups, Same Practical Question

A useful lighting kit starts with the jobs you need it to do.

Treeline Review’s “Best Camping Lanterns and Lights of 2026 (Tested)” is a timely prompt to take stock of your campsite lighting. But even a detailed gear roundup cannot decide how much light your particular trip needs. A compact headlamp may handle a backpacking weekend, while a family cooking at a picnic table benefits from a shared lantern and personal walking lights.

The practical answer to how to choose camping lights is to match each light to a task, then check its beam, usable brightness, runtime, and power needs. Start with hands-free light for moving around. Add a modest shared light for cooking and gathering, then consider extras only if they serve a clear purpose.

This guide focuses on buying criteria rather than product rankings or model-specific claims. The brightness ranges are starting points, not requirements. Beam shape, mounting height, surrounding darkness, and your eyesight all affect what feels sufficient. Before buying anything, check whether the lights you already own can cover the job.

    1. Choose a Headlamp, Lantern, or String Lights by Task

    Give each light a job before giving it space in your bag.

    A headlamp keeps both hands free for cooking, finding tent stakes, or walking to the restroom. A lantern spreads light across a shared area. String lights add gentle background illumination, but their small emitters often do little for detailed work. Treat them as an optional comfort item, not a substitute for a walking light.

    For backpacking, a headlamp is usually the first purchase. For car camping, start with personal headlamps and one shared lantern. If your evenings mostly involve chatting and heading to bed, you may need less lighting than a group preparing elaborate dinners or playing games.

    • Preparing dinner: start with a diffused lantern around 100 - 300 lumens and a cook’s headlamp around 50 - 150 lumens. Place the lantern beside or just above the work surface and aim the headlamp down.
    • Reading in a tent: try a headlamp with a broad flood beam or a small tent light around 5 - 30 lumens. Aim it at the page rather than another sleeper.
    • Walking around camp: around 30 - 100 lumens can be sufficient on an easy path. Increase output when the ground is uneven or you need to see farther ahead.
    • Finding something beyond the immediate campsite: a focused headlamp beam around 150 - 300 lumens can help for a brief search. Turn it down when you return.
    • Relaxing at the table: a dimmable lantern around 20 - 100 lumens is a useful starting point. Keep it below neighboring sightlines.
    • Adding background light: choose a short string-light run with a comfortable low setting. Keep it inside your occupied area and switch it off at bedtime.

    Buy fewer shared lights

    Start with one headlamp per person who moves around independently and one shared lantern for a small car-camping group. Test that combination before adding another lantern or string lights.

    2. Compare Lumens, Beam Spread, and Low Settings

    Useful light matters more than the biggest number on the box.

    Lumens measure total light output, not how bright a particular patch of ground will look. A focused 100-lumen beam can make a distant object easier to see than a 300-lumen lantern spreading light in every direction. For close camp chores, a broad flood beam is usually more comfortable than a small, intense spot.

    When comparing headlamps, look for a flood setting for close work and a spot setting if you expect to walk beyond the campground. Beam-distance specifications do not tell you how evenly a light illuminates the ground at your feet. Try it on steps or an uneven garden path before the trip.

    For lanterns, check the diffuser and controls. Look for a comfortable low setting, easy adjustment, and minimal glare. Around 200 - 400 lumens of maximum output is a reasonable shopping range for a small car-camping table, but you may use only a fraction of that after dinner. A much brighter lantern is not automatically more useful.

    Check the startup behavior, too. Some lights remember the last setting; others switch on at full brightness. A direct route to low or red mode is handy when everyone else is asleep. Warm-white light often feels pleasant around camp, but a warm color does not make an overly bright light considerate.

      “Choose the lowest setting that lets you do the job comfortably, then place the light where it helps rather than where it shines farthest.”
      — CampMate lighting rule of thumb

      3. Match the Battery Type to Your Trip

      Choose rechargeable, replaceable, or hybrid power around your charging access.

      Rechargeable lights suit frequent short trips when you can charge reliably at home. USB-C can simplify your cable collection, but check the exact model’s charging instructions and compatibility. Replaceable-battery lights let you restore power immediately without waiting for a recharge. Hybrid lights offer both options, although compatible rechargeable packs may be sold separately.

      For a two-night car-camping trip, start with every light fully charged. If you also plan to charge phones, a 10,000 mAh power bank is a reasonable starting point for planning, not a guarantee of sufficient power. Check each device’s battery capacity, expected use, and charging losses before relying on it.

      Avoid comparing mAh figures across batteries with different voltages. Watt-hours provide a better energy comparison: multiply volts by amp-hours. A 2 Ah battery rated at 3.7 volts stores about 7.4 Wh. Not all stored energy reaches the device during charging, so allow for losses and use a home test to check your plan.

      For replaceable cells, carry one complete spare set for the light you depend on most, stored in a protective case. Follow the manufacturer’s battery guidance, and do not mix old and new cells or different chemistries. Common battery types across your lights can simplify supplies on longer trips.

      • Two-night car camping: charge all lights, pack the necessary compatible cables, and add a tested power bank if your expected use calls for it.
      • Weekend backpacking: carry a primary headlamp with a complete spare battery set or a recharge option matched to its battery.
      • Longer trips without charging access: calculate nightly use, then choose replaceable cells, extra compatible packs, or sufficient power-bank capacity.
      • Group trips: assign the shared charging kit to one person, while keeping personal lights and their power reserves individually accountable.

      4. Check Runtime, Weather Resistance, and Fit

      Compare the specifications that match your normal use.

      An “up to 100 hours” claim may describe the lowest mode, not the brightness you need for cooking. Look for runtime listed separately for low, medium, and high. Where ANSI/PLATO FL 1 runtime is used, the endpoint can be when output falls to 10 percent of its initial level. That figure does not necessarily mean steady, useful brightness throughout.

      Also check whether high output steps down after a short period. A light with an impressive brief maximum can still be useful, but its sustained medium setting is usually the better comparison. Run your intended evening setting at home for three or four hours and see whether it remains comfortable for the task.

      For rain, look for an explicit ingress-protection rating. IPX4 indicates splash resistance, not suitability for immersion; the X means a dust rating is not specified. IPX7 addresses temporary immersion under defined test conditions, but does not establish a dust rating or guarantee resistance to every kind of water exposure. Keep port covers closed when required and follow the product instructions.

      A lantern needs a stable base or secure hanging point. Check whether its hook fits your shelter loops, and keep it away from hot cookware and stove flames. For headlamps, test strap comfort, balance, and controls with gloves. A lockout mode helps prevent accidental activation in a packed bag.

      Compare packed weight with batteries included. Backpackers should count the lamp, battery, cable, and any diffuser together. A collapsible lantern saves space only if it is easy to deploy and sturdy enough for your use. Before paying more for extra brightness or decorative modes, prioritize the features you will use every evening.

        Run a realistic evening test

        Cook or read using your intended camping setting. Check brightness after several hours, practice the lockout, and confirm that your cable and power bank actually charge the light.

        5. Build a Simple Setup for Your Group

        Start with these quantities, then adjust for evening activities and independent movement.

        Place shared lights close to the task rather than high above the whole campsite. A lantern on the table or securely hung just above the work surface can light dinner without broadcasting across the campground. Reposition it if it shines into another tent, and avoid seated eye level where possible.

        During cooking, use the lantern for the work area and a downward-aimed headlamp for checking food or finding utensils. After dinner, dim the lantern. For reading, use a personal low flood beam. For walks, take a headlamp instead of carrying away the shared light.

        • Couple on a two-night car-camping trip: pack 2 headlamps, 1 dimmable lantern with roughly 200 - 400 lumens available, and a charging kit or appropriate spare battery sets. Try the lantern around 50 - 150 lumens for ordinary table tasks and lower it when relaxing.
        • Family of four on a two-night car-camping trip: start with 4 suitable personal lights, 1 shared lantern with roughly 300 - 500 lumens available, and 1 compact backup light in a known place. Comfortable headlamps suit those walking independently. Try the lantern around 100 - 200 lumens rather than maximum.
        • Solo backpacker on a one- or two-night trip: pack 1 compact headlamp with a low flood setting and roughly 200 - 300 lumens available for brief brighter use, plus a complete spare battery set or tested recharge option. A compatible diffuser can provide tent lighting, but it is still the same light, not an independent backup.
        • Optional car-camping extra: bring 1 short string-light run inside the shelter if campground rules allow. Skip it if the lantern already provides the atmosphere and visibility you want.

        Light the workspace, not the whole campsite

        Aim headlamps down when talking, turn off unused lights, and take a personal light on restroom trips. Follow campground lighting rules and switch decorative lights off before bed.

        6. Adjust for Weather and Assign Shared Gear

        Add targeted extras rather than a second bag of lighting equipment.

        Weather usually changes protection and power planning more than the number of lights you need. Longer autumn evenings call for more operating time. Cold conditions can reduce battery performance, while rain makes secure mounting and protected charging connections more important.

        For groups, agree on shared quantities before departure. One household can bring the lantern and another the compatible charging kit, instead of everyone packing a large light. Add the items to your CampMate packing list with clear labels such as “table lantern, charged, Alex” and “USB-C cable plus power bank, Sam.”

        • Rain: pack a protective dry pouch for spare batteries and charging gear. Add a compatible hanging strap if the lantern needs sheltered placement. Recharge only when the light and connections are dry, following its instructions.
        • Cold: carry a complete spare battery set or extra compatible pack for the primary light. Keep the reserve protected and relatively warm. Follow charging-temperature limits; many lithium-ion batteries should not be charged below freezing unless specifically designed for it.
        • Long evenings: calculate actual lighting hours. Three nights at four hours per evening means 12 hours at your chosen setting, before adding a reserve. Compare that demand with the setting’s runtime, not the lowest-mode headline.
        • Wind: use a secure attachment for each hanging light. Choose stable tabletop placement if a lantern swings, and avoid loose string-light runs across walkways.
        • Group handoff: identify who brings the shared lantern, who checks its charge, and where the backup lives. Keep personal headlamps accessible before dusk rather than at the bottom of packed bags.

        FAQ: How to Choose Camping Lights

        Quick answers about brightness, battery choices, and optional extras.

        • How many lumens do you need for camping? For a small shared table, consider a dimmable lantern with about 200 - 400 lumens available, then expect to use lower settings much of the time. A headlamp with about 200 - 300 lumens available covers many campground tasks if it also has a comfortable low mode. Beam shape and placement matter as much as output.
        • Are rechargeable camping lights better than battery-powered lights? Neither is automatically better. Rechargeable lights suit trips with reliable charging access, while replaceable batteries offer a quick power swap. Choose based on trip length, charging availability, and the spare power you can comfortably carry.
        • Are red modes useful? Yes, for brief tent tasks when you want to avoid a bright white beam. Dim red light can help preserve dark adaptation, but brightness still matters. Red makes colors harder to distinguish, so low white light is often better for cooking, reading labels, and detailed work.
        • Are string lights worth packing? They can add gentle background light under a car-camping shelter. Treat them as optional: bring one short run, avoid flashing modes, and switch them off at bedtime. Backpackers can usually leave them home.
        • Is one lantern enough for a family? Usually, one shared lantern plus personal lights is a good starting setup. A second lantern makes sense when you regularly use two separate work areas at once. Try repositioning the first before buying another.
        • Can I rely on my phone flashlight? It can serve as an occasional backup, but it is awkward for hands-free chores and uses the same battery you may need for navigation or communication. A dedicated headlamp is a better primary camping light.
        • How do I judge advertised runtime? Find the runtime for your intended setting, check for output step-downs, and test the light at home. A long lowest-mode runtime does not tell you how long medium brightness will stay useful.

        Choose by Task, Test at Home, and Skip the Extras

        The best setup is the smallest one that comfortably covers your evening.

        Start with personal headlamps, add one shared lantern if you cook or gather around a table, and make every additional light justify its space. Favor useful low settings, broad beams for close work, straightforward controls, and a power plan you have tested.

        Before leaving, charge the lights, confirm the spares, and decide where the shared lantern will sit. At camp, light the task rather than the whole site. You will have what you need for dinner, a book, and an after-dark walk while leaving the surrounding night pleasantly dark.

          Continue the journey

          Give Your Lighting Kit a Simple Plan

          Add personal headlamps, a shared lantern, and the right power supplies to your CampMate packing list. Assign shared items clearly so your group brings what it needs without doubling up.

          Related Articles

          Continue exploring camping tips and packing guides