
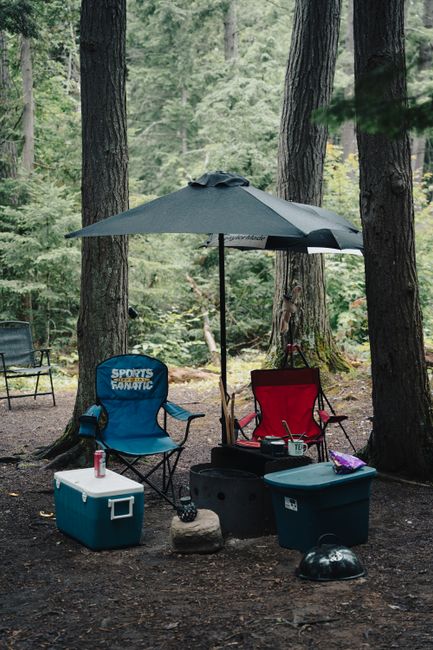
Durable camping gear upgrades on a picnic table at a quiet campsite
Gear & PackingTrip Setup

5 Camping Upgrades Under $150 That Actually Last More Than One Season

Small, smart gear upgrades can make every trip comfier without blowing your budget. Here are five durable camping upgrades under $150 that hold up season after season, plus simple tips for choosing and caring for them.

6 min read

Better camping, not bigger spending

The best camping upgrades are the ones you keep reaching for. Not because they look cool online, but because they make setup faster, meals easier, and downtime more comfortable.

Below are five upgrades under $150 that tend to last beyond a single season. Each one focuses on durability, repairability, and everyday usefulness at the campsite.

  • All picks are budget-friendly and built for repeat trips
  • Focused on comfort, convenience, and longevity
  • Easy upgrades that work for car camping and basecamp setups

Quick buying filter

Before you buy, ask: Will I use this on every trip? If the answer is yes, it is usually a better upgrade than something that only shines once.

1) Rechargeable lantern with warm light and a long runtime

A reliable lantern is one of the most-used items at camp. Look for warm or adjustable color temperature, multiple brightness levels, and a battery that can handle several nights.

Durability features that matter: a sturdy hanging hook, a stable base, water resistance, and a simple interface you can use in the dark.

  • Choose warm or adjustable light for a cozy campsite feel
  • Prioritize water resistance and a protected charging port
  • Bonus points for a red mode for low-glare evenings

Make it last longer

Run your lantern at medium brightness and use task lighting for cooking. Lower output usually means far better battery longevity over a weekend.

2) Insulated sleeping pad that balances comfort and toughness

If you upgrade one thing for comfort, upgrade what you sleep on. A quality insulated pad helps smooth out uneven ground and keeps you warmer during cooler nights.

Look for a higher R-value for shoulder-season trips, a durable face fabric, and a valve that is easy to use and less likely to clog with dust.

  • Pick insulation that matches your typical nighttime temps
  • Check fabric durability and weld quality at seams
  • Bring a small patch kit and store the pad uncompressed at home

Protect your pad

Use a groundsheet and clear the tent floor of pinecones and grit. A little prep prevents pinholes and extends pad life.

3) Compact cook system upgrade: better pot, better coffee, better meals

Cooking upgrades do not need to be complicated. A sturdier pot with a good lid, a compact kettle, or a reliable coffee setup can make camp meals feel smoother and less fussy.

For longevity, prioritize stainless steel or hard-anodized aluminum, solid handles, and lids that do not rattle loose in a bin.

  • Choose materials that resist dents and hot spots
  • Pack nesting pieces to save space and reduce clatter
  • A simple pour-over or press can be a daily-use upgrade

Keep cleanup easy

Bring a small silicone scraper and a dedicated sponge. Less scrubbing helps your cookware coatings and finishes stay in good shape.

4) Weather-resistant power bank for lights, phone, and small devices

A dependable power bank is a quiet hero for modern camping. It keeps navigation, photos, and lighting topped up without needing a full power station.

Look for a rugged shell, a reliable brand with realistic capacity ratings, and ports that match your gear. A built-in flashlight is a nice extra, but not the main reason to buy.

  • Aim for enough capacity for 2 to 4 days of light charging
  • Choose USB-C if your devices support it for faster charging
  • Store it in a dry bag when weather turns damp

Stretch your battery

Use airplane mode overnight and dim your screen. Small settings changes can cut power use dramatically on a multi-day trip.

5) Camp organization that survives the trunk: tote, bin, or hanging kit

Organization is an upgrade you feel every time you set up camp. A durable tote or bin system keeps essentials together and protects gear from dust, spills, and surprise rain.

Choose thick-walled bins, strong handles, and lids that seal or latch securely. For tents and picnic tables, a hanging organizer can keep small items from disappearing into the duff.

  • Label bins by category: kitchen, lighting, sleep, tools
  • Pick containers that stack without bowing or cracking
  • Use a small zip pouch for the items you always misplace

Pack once, camp often

Keep a dedicated camp bin stocked between trips. You will spend less time repacking and more time enjoying the outdoors.

Wrap-up: invest in repeat-use comfort

Camping upgrades that last are usually the ones that solve everyday annoyances: dim lighting, restless sleep, fussy cooking, dead batteries, and messy gear piles.

Start with the upgrade you will use on every trip, take care of it, and build your kit slowly. Your future self at camp will notice the difference.

  • Choose durability and daily usefulness over novelty
  • Maintain gear with simple habits like drying, cleaning, and smart storage
  • Upgrade one category at a time to keep spending focused

Plan your next kit refresh

After your next trip, write down the top two things that slowed you down. Those are your best targets for the next under-$150 upgrade.

Continue the journey

Plan your next upgrade the easy way

Use CampMate to track your gear, build packing lists, and plan trips so your upgrades actually get used.

Related Articles

Continue exploring camping tips and packing guides